


Azure Logic App Hands-On Step-by-Step
Let’s continue the Logic Apps article part-2. Concept wise we already covered in the previous article Logic App part-1. So in this article, we will go through create Logic Apps step-by-step in the Azure portal without writing a single line of code.
Before starting, first, we will discuss the business process that needs to automate.
Workflow: Suppose there is an online training institute who provides training on various technologies. Institute just started one more training course Microsoft Azure and the class's first topic was Azure Logic Apps. Now, the institute decided to collect feedback from the audience from social media. So we will create a workflow using connectors, Triggers, actions and control actions. First, we will take a twitter connector that will trigger whenever new tweet comes from audience, then analyze the text sentiments whether it is positive or negative, after that will make a condition if sentiments score is less than 0.5 then send email(negative feedback) else tweet store in cosmos Db(Positive feedback).
So let’s start step-by-step to create this workflow.
There are some prerequisite before creating Logic Apps
- Need Azure Subscription. You can take 30 days of free trial.
- Create Cognitive Text Analysis Service.
- Create CosmosDB Account with SQL API
First, make sure to log in to the Azure portal and create a Resource Group.
Step1: Create a Cognitive Text Analysis Service. To do so click on All Services=>AI + Machine Learning=> Cognitive Services.

Step2: Click On Add Button and search for Text Analysis and select this service.

Step3: Now you must give the unique name of your Text Analysis Cognitive Service, Subscription that you, Location that nearby you, pricing tier I have taken F0 which gives us 5k transactions per 30 days, Select already exist Resource Group or you can create a new one. After filling all these fields click on Create.

Step4: Click on Keys in the left sidebar and get Name of service and Key1, also click on Overview in the left sidebar and get the endpoint of service. Those three values will use later in our Logic Apps workflow.

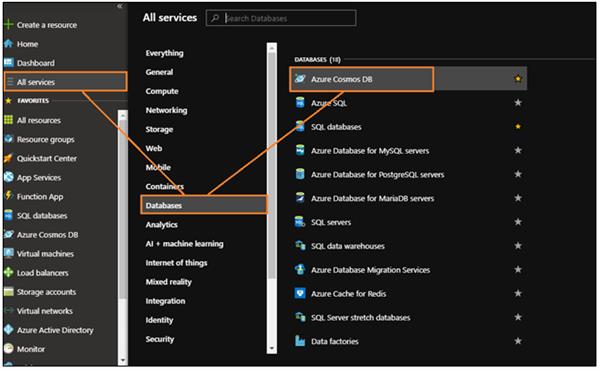
Step5: Create one CosmosDb Account All Services=> Database=> Azure Cosmos DB.
Step6: You have to fill a few fields. Subscriptions that you have, Select resource group or create a new one, give the unique account name and last is select the Core SQL API then click on the Preview+Create button.

Step7: After creating a Cosmos DB account with SQL API, now you have to add a Container(Earlier named was "collection", now renamed as a container because it works as a container). To do so click on Add Container then below screen will appear. Fill All the fields like create the Database Id or select existing if you have, then leave default 400 throughputs as we are creating for learning the purpose, give the container id and last one is collection id which can be any property of your document then click on the Ok button.

Step8: Cool, finally we will create Logic Apps, to do so go to All Service=> Integration=> Logic Apps.

Step9: Click on Add or Create Logic App button.

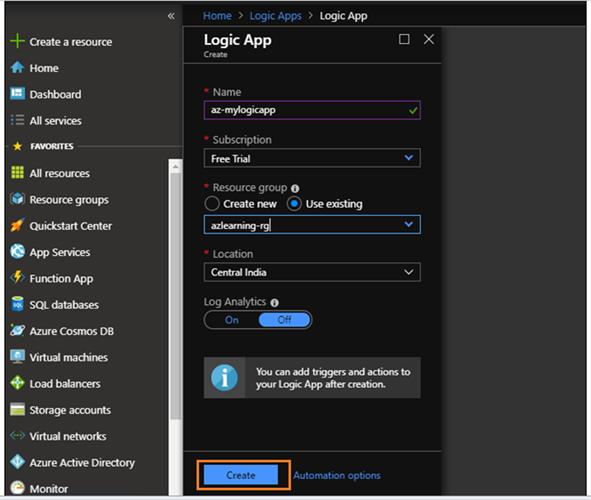
Step10: Fill all fields, Name of Logic App, Resource Group, Subscription, Location, etc. You can leave the log analytics off as we do not need it and action and trigger we will add later. Click on create button to create Logic App.
Step11: Now Logic App is created, let’s click on Logic App Designer on the left bar, you can see many connectors and Templates. We will select a blank template.

Step12: Now you can search for Twitter Connector that will trigger first when the new tweet will be tweeted.

Step13: Need sign in twitter account and authorize the app.

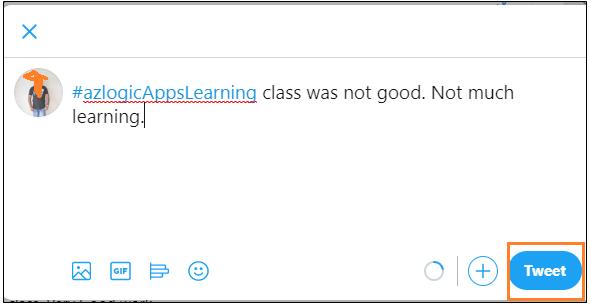
Step14: There are few fields need to fill, search text can be any hashtag, in our case we have taken #azlogicAppsLearning(will be used while tweeting), then you can set the interval that is by default 3 but here we changed it 2 and taken frequency default as minutes.

Step15: Click on +Next step and search for Text Analytics and select it then a few more actions will appear on the screen, select Detect Sentiment.

Step16: Remembered, in the beginning, we have created one text analytics cognitive service and kept Name, Key and endpoint. So fill those in this screen then click on Create button.

Step17: In the below screen, you have to put text. So, use add dynamic content and select Tweet Text then click on +Next step for adding a condition.

Step18: Search for “Control” select it and next select “Condition” control action.

Step19: Now let’s make a condition by filling below screen fields, first choose a value by selecting score, next set condition “is less than”, condition value will set 0.5. So condition is text score < 0.5 is true else false.

Step20: In true section add an action by selecting outlook connector and authorize it by your Outlook credential as we did earlier for twitter connector then select “send an email” action.

Step21: Some fields need to fill, in the “To” text field, fill the email id for sending an email when flow comes in a true condition. Write some static text Subject and Body with dynamic content. Check in the below image and do accord.

Step22: Now add cosmos DB connector as action in false section and remember we already added one cosmos account with SQL API and also added a container to it. So browse it from here and fill the account name in the first text field. Click on the Create button.

Step23: Select already created Database ID, Collection ID but you have to make a JSON body as in below screenshot for Document field, next give the partition key as while creating Cosmos DB SQL API container, we set as id field as partition key, so you can put it here in “Partition key value”.

Now we have done with the workflow, let’s click on the save button on the top of the screen and then click on the Run button to run this workflow.
Step24: Now check the true condition for negative feedback by tweeting negative tweets (write the same hashtag which we had set in twitter connector). After tweeting you can check the logic app designer if condition, it will show green mark it means executed successfully.

Step25: Check your email inbox(also check spam, in my case, I got in Spam). We got email whatever body and subject we had decorated.

Step26: Now check the false condition for positive feedback by tweeting positive tweet(write the same hashtag which we had set in twitter connector). After tweeting you can check the logic app designer false condition, it will show green mark it means executed successfully.


Step27. Now you can go to your cosmos DB account, check the document.

Hope this will help you.
Will continue the Logic app in the next article and that will be the final part of the Logic App.
Thanks.
