


How to Host / Deploy Angular Application on Azure Web Service
How to Host / Deploy Angular Application on Azure Web Service
Hosting our local Angular Application from localhost to live servers like, Azure, AWS or Firebase is a common need from every developer.
In this article, I’ll show you how you can upload your local Angular application or samples on Azure Web Service.
I have divided this post into three sections as below:
- Creating a local Angular application
- Creating Azure Web Service.
- Deployed Angular Application in Azure.
So, Let’s get into the action and follow the below article with the Step by Step.
Create Angular Application
You can skip this step if you have an angular application already with you.
Per official ng CLI commands use the below command to create an angular application.
“ng new [Application Name]”
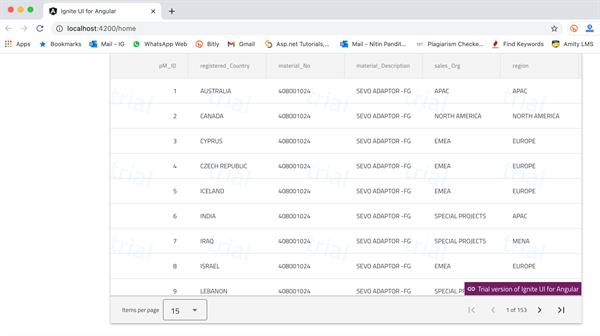
Open in the code Editor and do the required action as per your application needs. I have already created an Angular application with some API request and an Ignite UI Grid object as below:
Once you are done with the Angular application use the below command to create a production-ready build of your application:
“ng build - - prod”
The above command will create a production-ready build, out of your application in the “dist” folder.
Creating Azure Web Service
Now, we’ll go in Azure Portal and create an Azure app service for hosting this local Angular Grid Sample with Ignite UI, so follow the below steps:
Step 1: Login in https://portal.azure.com
Step 2: Click on “ + “ in the left side menu of the Azure portal to create a new App Service.
Step 3: Now, enter and required details as below:
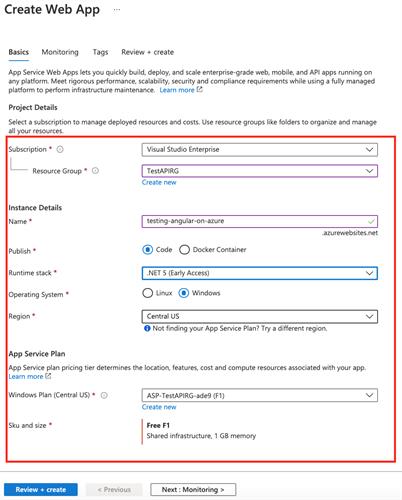
Click on “Review + Create” to quickly submit this app.
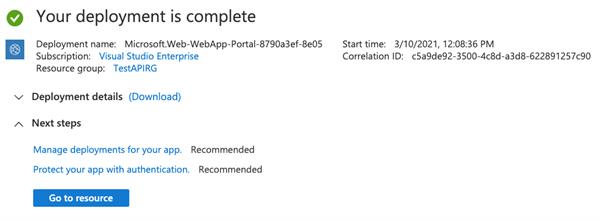
Once you get the success message for this app as below:
Hosting Local Angular App to Azure
Step 1: Open this in the Azure portal by clicking on it in the dashboard.
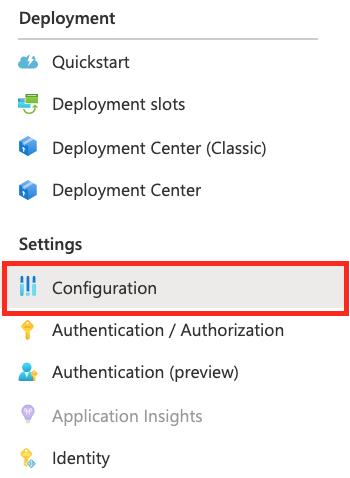
Step 2: Find Application setting in the “Configuration option life side”:
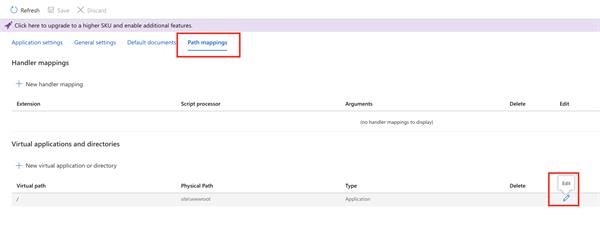
Step 3: Move to “Path Mapping” Tap and Edit the existing virtual path “site/wwwroot” and add the folder name you got in “dist” after the build command.
The New Physical path must look like the below image, don’t forget to save this setting before the next step.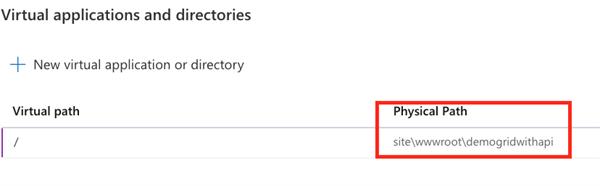
Step 4: Find Advanced tools in the left menu or search for the quick action and click on “Go”.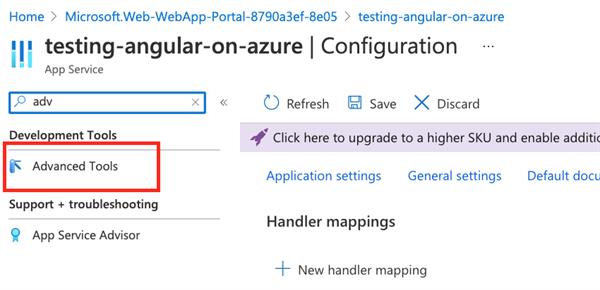
Step 5: you can check the supported runtime setting with the selected option.
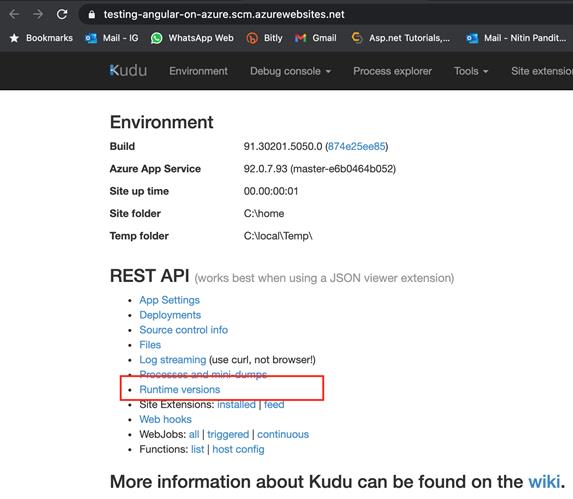
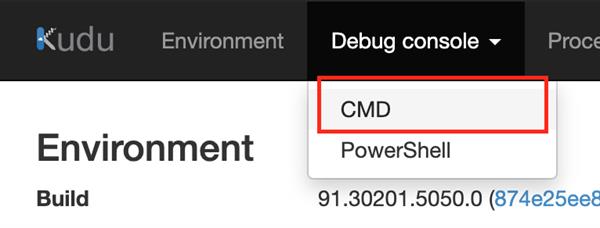
Find the CMD under Debug console.
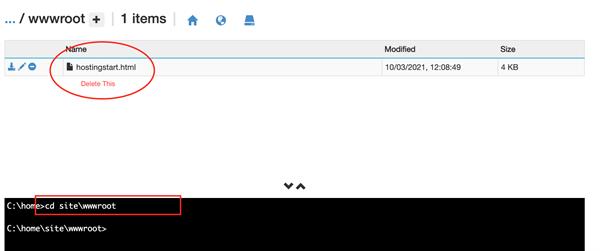
Now, move into site >> WWWRoot folder by running the “ cd site/wwwroot” command in the CMD section and delete the default “Hostingstart.html” file.
Step 6: Last by not least, drag the output folder from dist to here “wwwroot” folder in the portal or you can use other hosting methods like Ftp uploads, FileZilla, or Azure tools extension in VS Code to upload the build files.

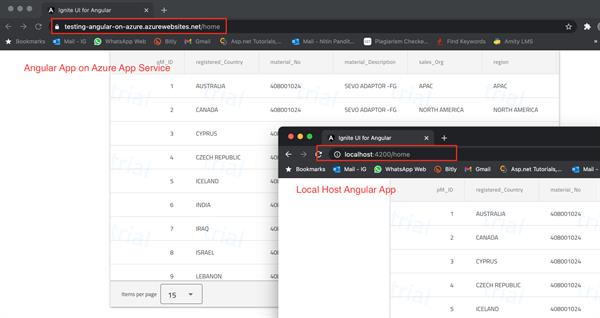
Hit the App service URL in the browser and I hope you’ll find your working application the same as the localhost.
Thanks for reading this article, I hope this helps you.
