


How to Migrate a .Net Framework Windows Forms App to .Net Core
If you have any application built in .Net Framework and now you want to change your application into .Net core application. So, Let’s see how we can start the migration from the .Net framework to .Net core.
I have an existing .Net Win form app with an additional NuGet package for NUnit, it might be possible your application can have many NuGet Packages along with the default .Net assemblies so we can use all of them into .Net core app if they are supporting .Net core.
Now Let me show you my .Net Win Form Application.
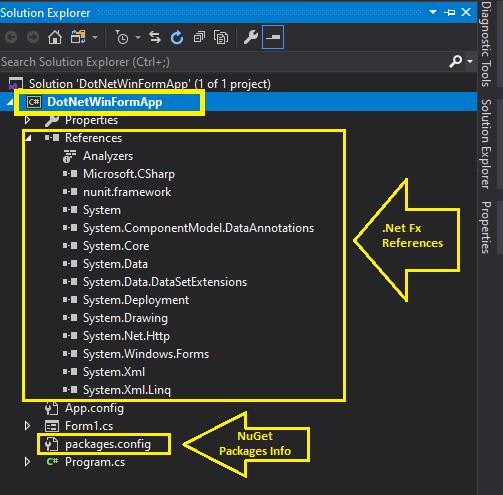
This is my solution for the "Windows Forms application" where you can see all the default .Net assemblies and NuGet Packages.
When I run this application, you will get the following output. In this application, I have just one win-form with a button to open a dialog for selecting an image to show in a picture box.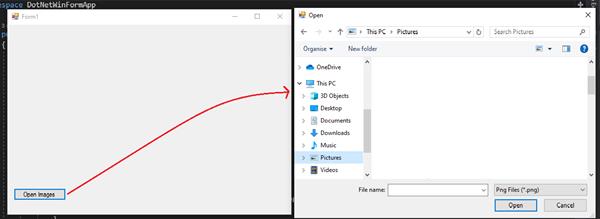
This Application is working fine till now and now we must move this along with all the dependencies into .Net core.
For .Net core migration, you can follow the following steps:
Step 1:
So before start migration, we must check the compatibility of this application with .Net core. For checking this we need an Application name as Portability Analyzer, which a freely available on GitHub or you can use the below link to download this.
Once you’ll get that app, run this. I hope you’ll get this screen:
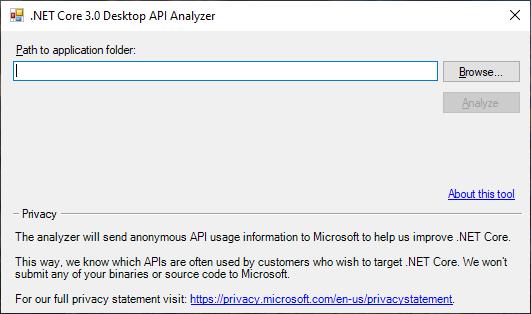
Now select your application folder with this browse button on the top right side of the screen and after the click on the next button “Analyze”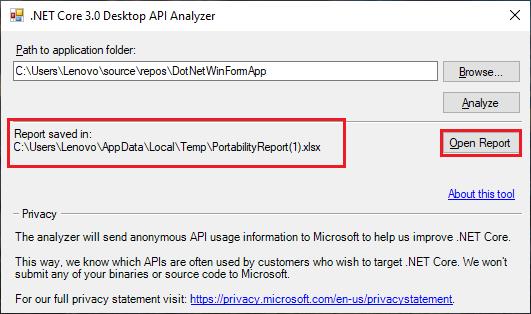
This will give you an Excel file with the report of migration, Open that Excel file. This file will have two sheets, in the first sheet you’ll get the report in percentage(%), that will show the compatibility with .Net core of all the assemblies is being used by this project.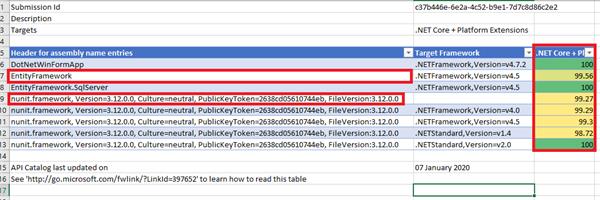
If all are green with 100% so you can directly jump to the next step, If not so go and check-in https://Nuget.org with the package name, Like in this application I have NUnit, so I searched for the same.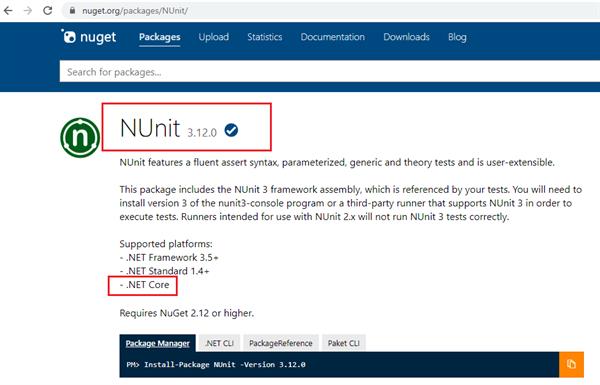
If you see that all your dependencies are supporting .Net core so now jump to the next step, If not so try to find some alternative option for this package that supports .Net core add that and do the changes the classes if required.
Step 2:
This step is optional only for those who have any other NuGet packages. Find the packages.config file in your project solution and right-click on this file.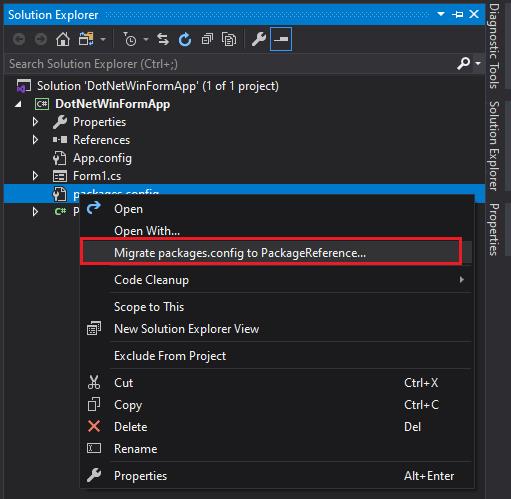
Find the option “Migrate packages.config to PackageRefrence… “.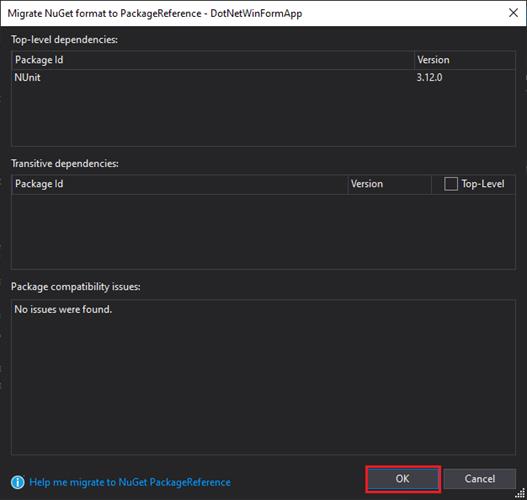
Now three should be a confirmation window, just press enter on the OK button.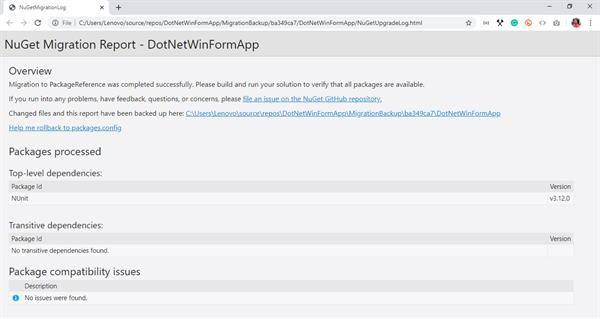
It’ll open the NuGet Migration report as an HTML document in your default browser. You don’t have to anything with this file, just close is after review.
After this, your packages.config file will be no longer in your project all the information will move into the “.csproj” file.
Step 3:
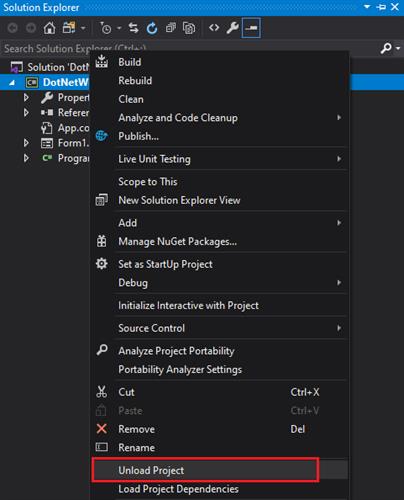
Now Right-click on your project name and find the unload this project, so that we can edit the “.csproj” file.
Again, right-click on the project name after unload and click to Edit option.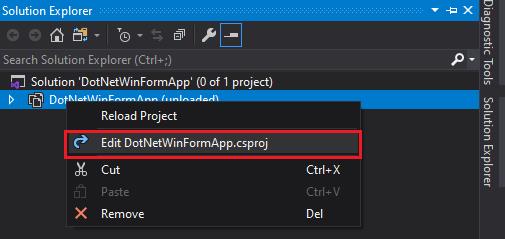
Now you have all the project settings, select all and cut from this file and paste in notepad for some time because we need our NuGet packages information from it, in a while.
Now, your project file must be empty as we must use this file for the required setting of the .Net core.
We need to set four properties for .Net core projects like Output Type, Target Framework, Use Windows form and Generate Assembly Info.
you can paste the following code or type them manually.
<Project Sdk="Microsoft.NET.Sdk.WindowsDesktop">
  <PropertyGroup>
    <OutputType>WinExe</OutputType>
    <TargetFramework>netcoreapp3.1</TargetFramework>
    <UseWindowsForms>true</UseWindowsForms>
    <GenerateAssemblyInfo>false</GenerateAssemblyInfo>
  </PropertyGroup>
</Project>
Your project file must be like this now.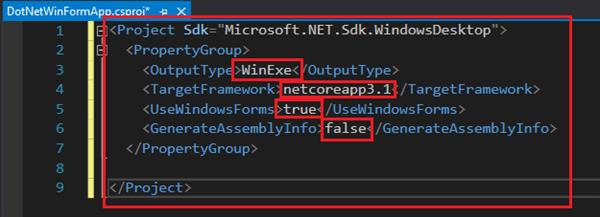
Now open the old code which you cut from this project file and find an Item group where your dependency is added. In my case, I have just one NuGet dependency of NUnit, so I have added that Item group from the old code of this project.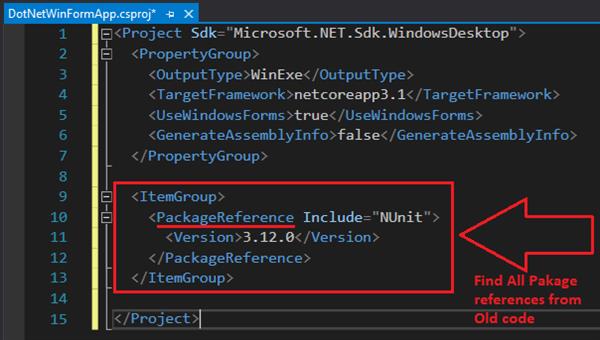
After this save all the changes.
Step 4:
Now, this is the last step, just reload this project.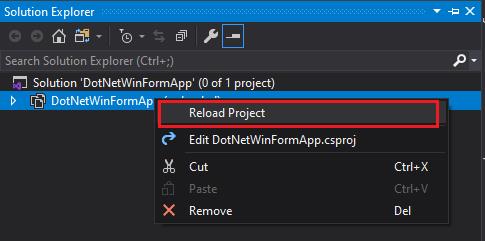
Open solution explorer and the new solution, you’ll see the changes as your project have all the Dependencies required for .Net core application along with NuGet packages.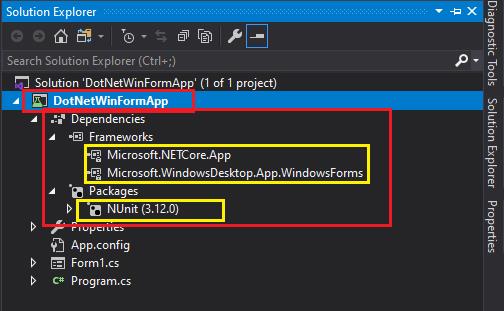
Just build your app and run this.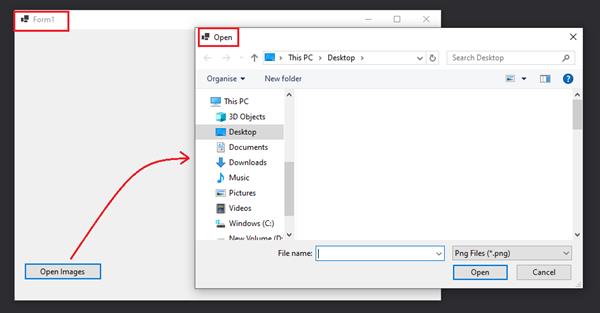
In my case, This application is still working fine with .Net core. I hope this will work for you too.
Thanks.
