


Upload Image to Azure Blob Storage in ASP.NET
In this article, we will learn the uses of Azure Blob Storage and how to use blob storage in ASP.NET Project. Firstly, create an ASP.NET project in Visual Studio, so open Visual Studio and follow these steps:
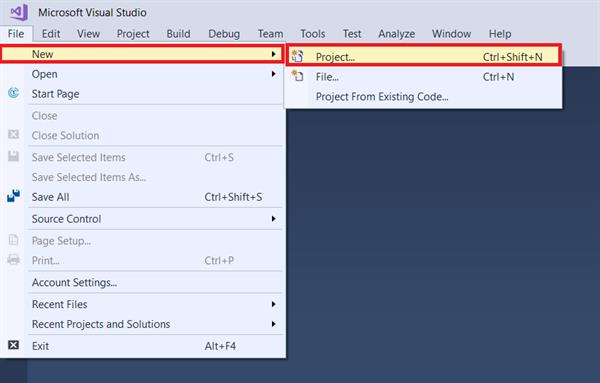
Step 1: Open Visual Studio and select the File menu, New, then project.
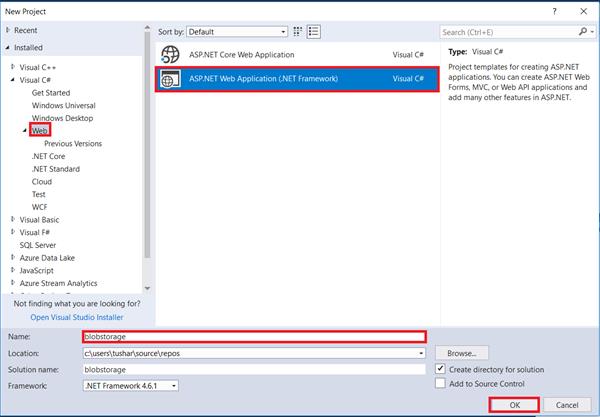
Step 2: Go to Visual C#, Web and then ASP.NET Web Application.
Step 3: In the name section, give a name to a project. Here I have given the name ―blobStorage.
Step 4: Click on ―OK button to create a project.
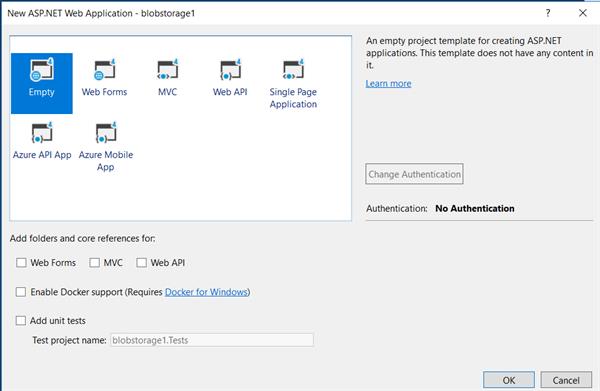
In the following figure, choose an Empty project.
- Click ―OK
We can see, in our project, there are three types of categories items, properties, References, and Web.config.

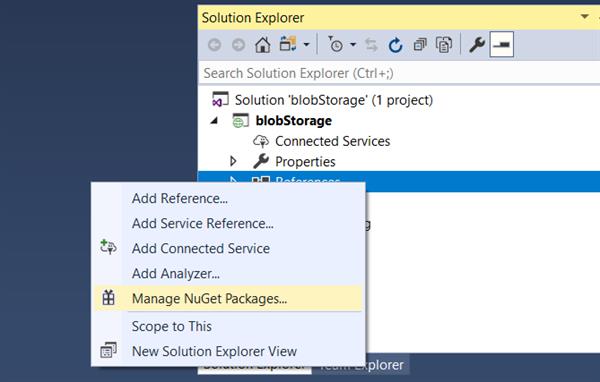
Now we need to install the Microsoft Azure Storage package for using Azure Storage Access and all supported classes
- Right click on References ―and select Manage NuGet Packages.
In the following figure, go to the search box and type ―Azure. After this you will find the ―Microsoft Azure Storage, click on ―Install button.
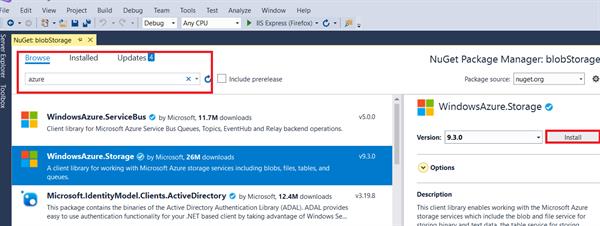
Here we also need to install the Azure storage client packages. So, go to the search box, type the ―Azure Storage Client. After typing, click on ―Install button.

We successfully installed the ―Azure Storage Client package also.
- Click on ―Close
- Go to your project, here my project name is ―blobStorage.
- Right, click on to a project, select ―Add and select ―Web Form.
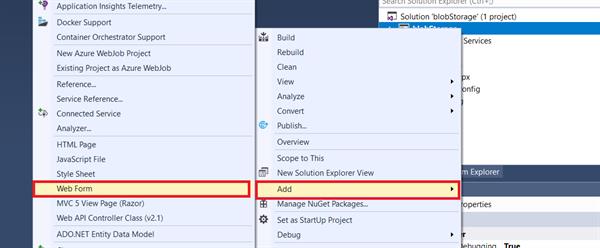
Here, I am going to create a Web Form; here I gave the name ―MyForm to my Web Form, you can give any name to your Web Form.
Click on ―OK button.
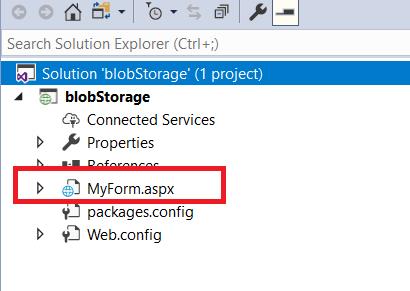
After creating a form, you can see your project, where form will be created successfully with the name ―MyForm.aspx.
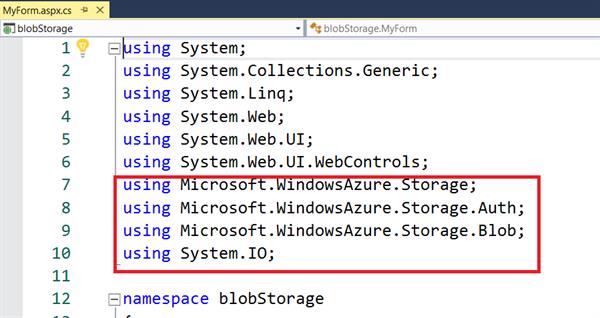
In the ―MyForm.aspx.cs page, let me do some changes.
In the ―MyForm.aspx.cs page, I have added all namespaces which are minimum required.
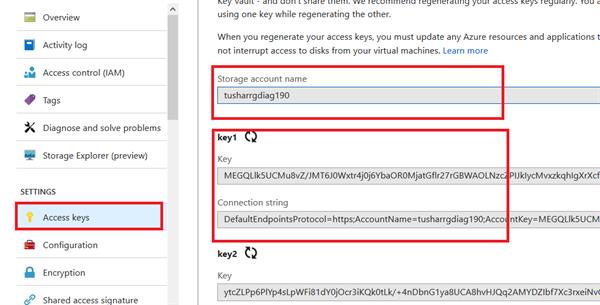
Now we need ―accountname and ―accesskey to get connected with Azure Account, so go to Azure portal.
- Go to ―Storage option where I have created a Storage Account with the name ―tusharrgdiag190.
- After clicking ―tusharrgdiag190 named Storage Account, go to the bottom of the window and select ―Access Keys.
- Go back in your project and make some changes over there.
- In the ―accountname and ―accesskey paste the copied item over there.
- And make some other code over there for getting connections with Azure storage account with ―CloudStorageAccount class object and at last convert your image into stream upload as in the following image:

Code
using Microsoft.WindowsAzure.Storage;

using Microsoft.WindowsAzure.Storage.Auth;

using Microsoft.WindowsAzure.Storage.Blob;

using System.IO;

string acname = "Your Account Name";

string acckey = "Your Access Key";

try

   {

      StorageCredentials creden = new StorageCredentials(acname, acckey);

      CloudStorageAccount acc = new CloudStorageAccount(creden, useHttps: true);

      CloudBlobClient client = acc.CreateCloudBlobClient();

      CloudBlobContainer cont = client.GetContainerReference("mysample");

      cont.CreateIfNotExists();

      cont.SetPermissions(new BlobContainerPermissions

      {

         PublicAccess = BlobContainerPublicAccessType.Blob

      });

      CloudBlockBlob cblob = cont.GetBlockBlobReference("Sample.jpg");

      using (Stream file = System.IO.File.OpenRead(@"D:\Cloud Computing\Sample.jpg"))

      {

         cblob.UploadFromStream(file);

      }

   }

catch(Exception ex)

{

   Console.WriteLine(ex);

}
One more thing, here we need to create a Web App Profile for publishing our app into the cloud.
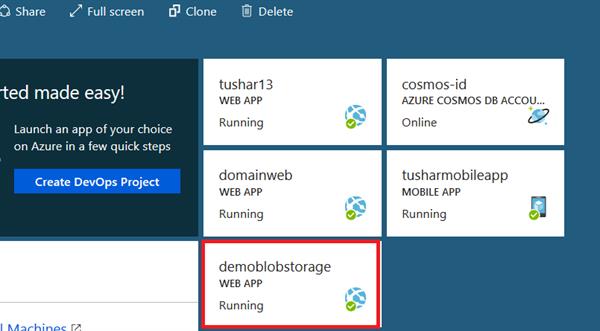
Simply go to Create a Resource in your Azure Portal and click on ―Web to add a new Web App.
Since we have already learned to create a new Web App. After doing all the creation steps, we can see our created Web APP (―demoblobStorage).
And it is in running mode.
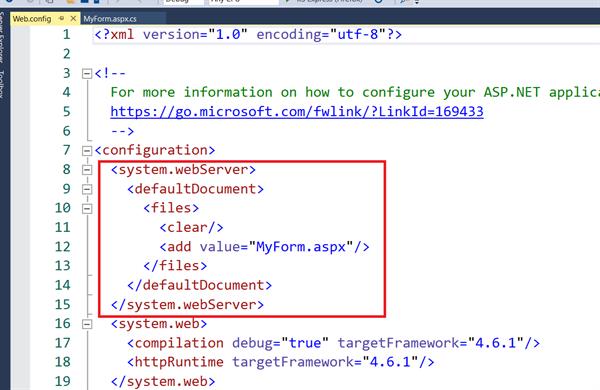
We make some code in the Web Config file also.
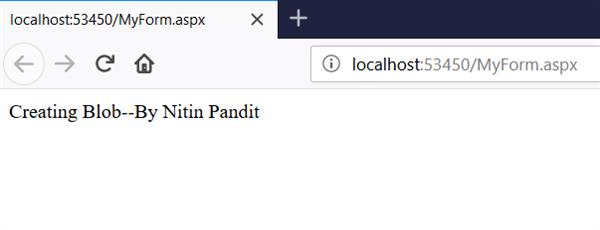
Here in the <add value=MyForm.aspx/>, ―My Form is my Web form.
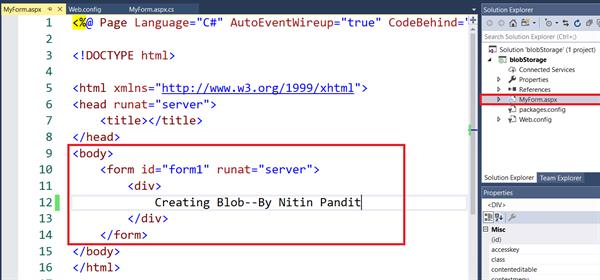
In the ―MyForm.aspx you can give any message for output. Whenever you build your project, the typed message will be your output.
So, here in the div section I have given a message, “Creating Blob---By Nitin Pandit”.
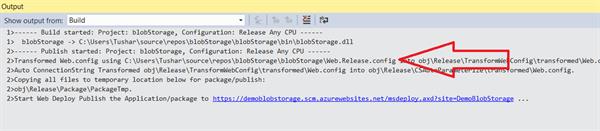
Now we need to publish our created project in the cloud. It will also save in the Azure Explorer.
You can publish your project by right click on your project. Here my project is ―blobStorage, so select the ―Publish option which we discussed in the previous topics.
After this, now we can see the status of our publishing. So my ―demoStorage app service published successfully.
Now build your project and get your output.
So, finally, we got our output.
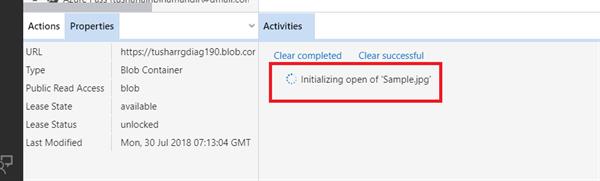
We can see the changes of this in our Azure Explorer.
Now refresh the Azure Explorer to check your image.
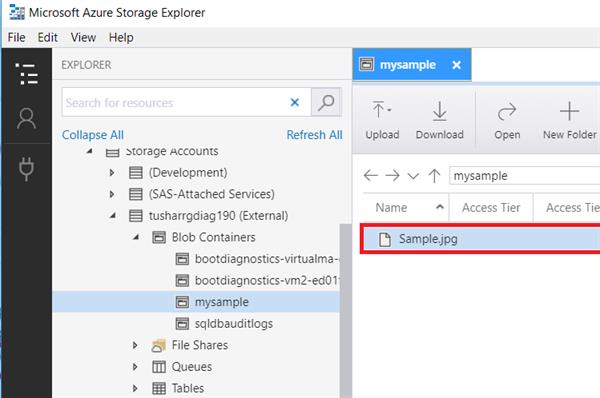
“Sample.jpg” is my image which is generated by programming.

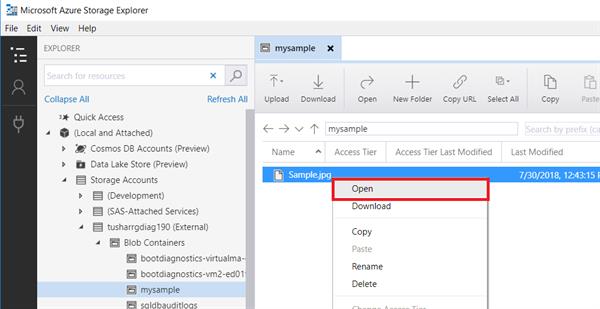
It can take a few moments to download the image is in progress.
Here's the final output and you can see the image:
Thanks for reading this article
