


Xamarin.Forms - UI Automation Testing
Introduction
Xamarin.Forms code runs on multiple platforms - each of which has its own filesystem. This means that reading and writing files is most easily done using the native file APIs on each platform. Alternatively, embedded resources are a simpler solution to distribute data files with an app.
Xamarin.UITest
Xamarin.UITest is a C# testing framework using NUnit for UI Acceptance Tests on iOS and Android apps. It integrates tightly with Xamarin.iOS and Xamarin.Android projects, Xamarin.UITest is the Automation Library that allows the NUnit tests to execute on Android and iOS devices. The tests interact with the user interface as a user would: entering text, tapping buttons, and gestures - such as swipes.
Like Appium and Robot Framework, Xamarin.UITest is among the best open-source, cross-platform UI testing frameworks. It’s a more straightforward choice when it comes to automating Android and iOS apps built with Xamarin.Forms.
Follow the Arrange-Act-Assert pattern:
Arrange: The test will set up conditions and initialize things so that the test can be actioned.
Act: The test will interact with the application, enter text, pushing buttons, and so on.
Assert: The test examines the results of the actions run in the Act step to determine correctness. For example, the application may verify that a particular error message is displayed.
Prerequisites
Visual Studio 2017 or later (Windows or Mac)
Setting up a Xamarin.Forms Project
Start by creating a new Xamarin.Forms project. You wíll learn more by going through the steps yourself.
Create a new or existing Xamarin forms(.Net standard) Project. With Android and iOS Platform.

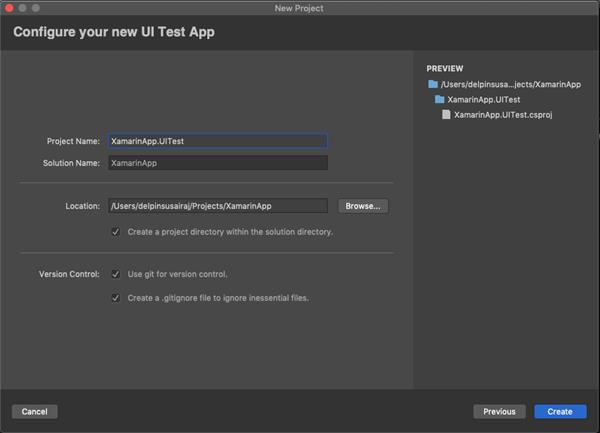
Add UI Test Project
Now, Add the UI Test project to your existing Xamarin.forms project. Go to your solution add a new project select Xamarin UI Project refer to the following screenshot.
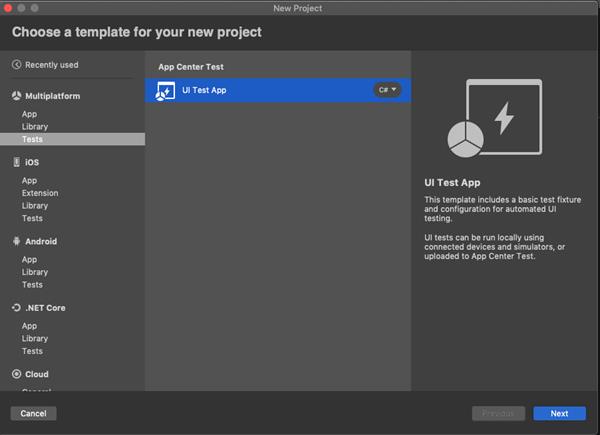
Name your UI Test project the click to add.
Use AutomationId
- AutomationId should be added to all UI controls that are required for UI testing.
- AutomationId is a Dependency Property that can also be set with a binding expression.
- InvalidOperationException will be thrown if an attempt is made to set the AutomationId property of an element more than once.
- AutomationId and X:Name are different. You must set AutomationId for all controls.
Ex: AutomationId="EntryPhoneNumber"
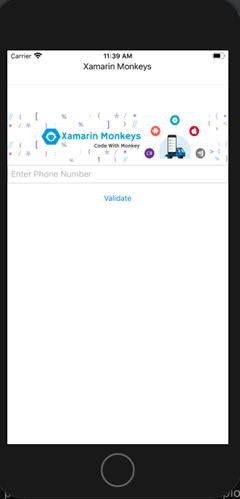
Create a UI
Here, I'm going to create a simple UI for UI Testing.
MainPage.XAML
<?xml version="1.0" encoding="utf-8"?>
<ContentPage xmlns="http://xamarin.com/schemas/2014/forms"
             xmlns:x="http://schemas.microsoft.com/winfx/2009/xaml"
             xmlns:d="http://xamarin.com/schemas/2014/forms/design"
             xmlns:mc="http://schemas.openxmlformats.org/markup-compatibility/2006"
             xmlns:TitleView="clr-namespace:XamarinApp.CustomView"
             mc:Ignorable="d" x:Class="XamarinApp.MainPage">

    <NavigationPage.TitleView>
      <TitleView:TitleView/>
    </NavigationPage.TitleView>

    <StackLayout Margin="0,50,0,0" VerticalOptions="StartAndExpand">
        <Image VerticalOptions="Center" Source="xamarinmonkeysbanner.png"/>


        <Entry AutomationId="EntryPhoneNumber" Placeholder="Enter Phone Number" x:Name="entryPhoneNumber"/>
        <Button AutomationId="ValidateButton" Text="Validate" Clicked="PhoneNumberValidate"/>
        <Label AutomationId="ResultLabel" x:Name="lblResult"/>

    </StackLayout>
</ContentPage>
Configure App
Here, you need to configure both iOS and Android App paths see below code.
AppInitializer.cs
public static IApp StartApp(Platform platform)
        {
            if (platform == Platform.Android)
            {
                return ConfigureApp.Android.Debug().ApkFile("../../../XamarinApp.Android/bin/Debug/com.companyname.xamarinapp.apk").StartApp();
            }

            return ConfigureApp.iOS.AppBundle("../../../XamarinApp.iOS/bin/iPhoneSimulator/Debug/XamarinApp.iOS.app").StartApp();
        }
Android
You can specify your APK path. Go to your Android project debug/bin folder you can find the com.companyname.xamarinapp.apk file you copy the file path and set the ApkFile.
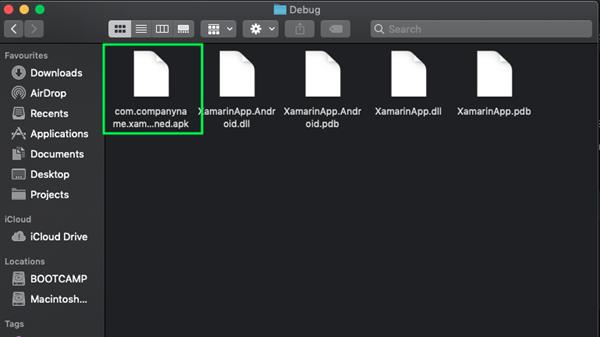
ConfigureApp.Android.Debug().ApkFile("../../../XamarinApp.Android/bin/Debug/com.companyname.xamarinapp.apk").StartApp();
The device can be specified using the DeviceSerial method:
ConfigureApp.Android.ApkFile("../../../XamarinApp.Android/bin/Debug/com.companyname.xamarinapp.apk")
                               .DeviceSerial("03f80ddae07844d3")
                               .StartApp();
iOS
Specify the iOS IPA path. Go to your iOS debug/bin folder you can find the AppName.iOS file you copy the file path and set the AppBundle.
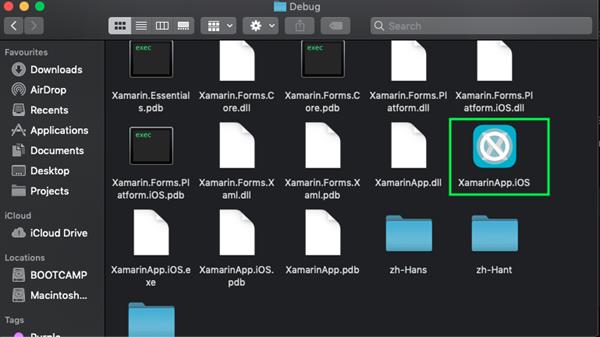
ConfigureApp.iOS.AppBundle("../../../XamarinApp.iOS/bin/iPhoneSimulator/Debug/XamarinApp.iOS.app").StartApp();iOS Enable Test Cloud
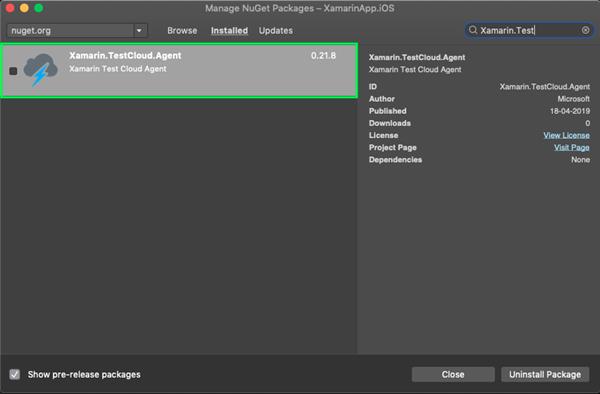
To run tests on iOS, the Xamarin Test Cloud Agent NuGet package must be added to the project. Once it's been added, Add following code into the AppDelegate.FinishedLaunching method:
AppDelegate
public override bool FinishedLaunching(UIApplication app, NSDictionary options)
        {
            Xamarin.Calabash.Start();
            global::Xamarin.Forms.Forms.Init();
            LoadApplication(new App());

            return base.FinishedLaunching(app, options);
        }
Set Compiler Variable
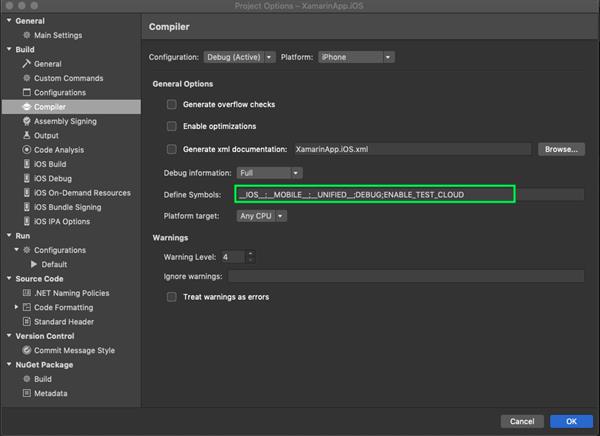
Set compiler variable to your iOS app. Go to the project option in the Compiler section set define symbols. "ENABLE_TEST_CLOUD" refer below screenshot.
Write UI Test
Now, I'm going to write the Automation UI Test for PhoneNumber validation. See below code
[TestFixture(Platform.iOS)]
public class Tests
{
IApp app;
Platform platform;
public Tests(Platform platform)
{
this.platform = platform;
}
[SetUp]
public void BeforeEachTest()
{
app = AppInitializer.StartApp(platform);
}
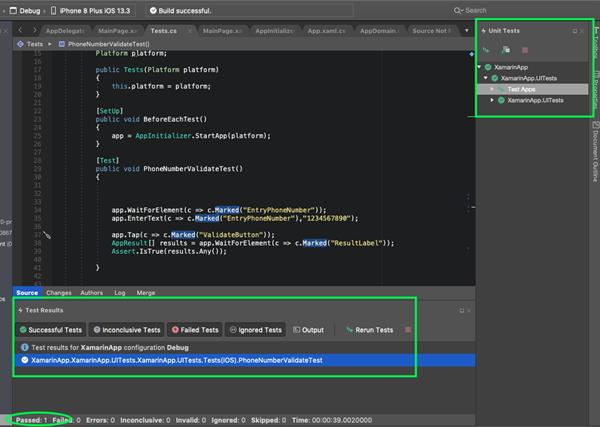
[Test]
public void PhoneNumberValidateTest()
{
app.WaitForElement(c => c.Marked("EntryPhoneNumber"));
app.EnterText(c => c.Marked("EntryPhoneNumber"),"1234567890");
app.Tap(c => c.Marked("ValidateButton"));
AppResult[] results = app.WaitForElement(c => c.Marked("ResultLabel"));
Assert.IsTrue(results.Any());
}
}Run
The test method has been passed.
Download full source from Github
References
https://docs.microsoft.com/en-us/appcenter/test-cloud/frameworks/uitest/
I hope you have understood you will learn how to test Xamarin UI Elements Xamarin.Forms.
Thanks for reading. Please share your comments and feedback.
Happy Coding :)
