


azure storage account using Azure Private Endpoint
Connect privately to azure storage account using Azure Private Endpoint
Azure Private Endpoint is the fundamental building block for Private Link in Azure. It enables Azure resources, like virtual machines (VMs), to communicate privately with Private Link resources.
So In order to achieve Private Endpoint connectivity, we need to create 3 Azure services
1. Azure Virtual Network
2. Azure Virtual Machine
3. Azure Storage account
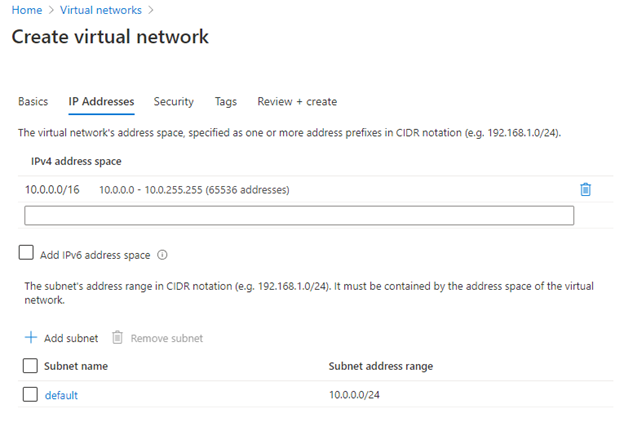
1. Lets create a new Azure virtual network, here i just selected the by-default IP range.
2. Now lets try to create a new virtual machine for testing Private endpoint for storage.
While creating virtual machine --> during Network selection i just selected Vnet which we created in step1.
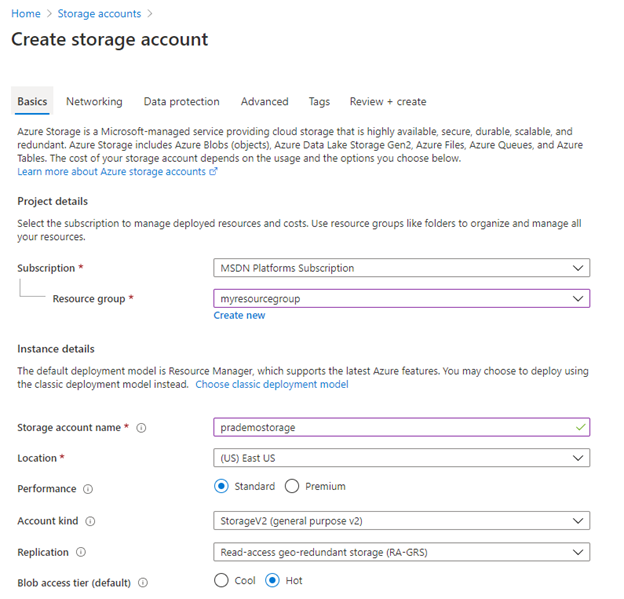
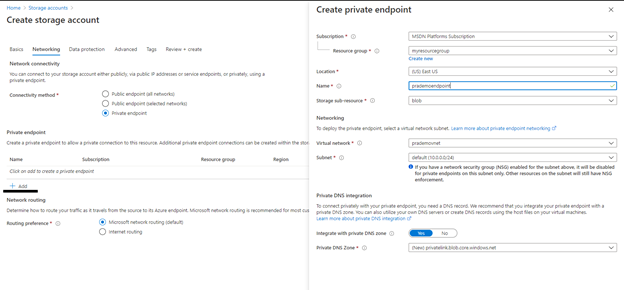
3. Now we need to create a new storage account with Private endpoint option.
Under networking → select Private endpoint → Click on + → Give some name of the Endpoint →
Select existing Virtual network which we want to use → provide Provide DNS zone name
Now lets start doing the test of Private endpoint connectivity
1. Login to Azure VM
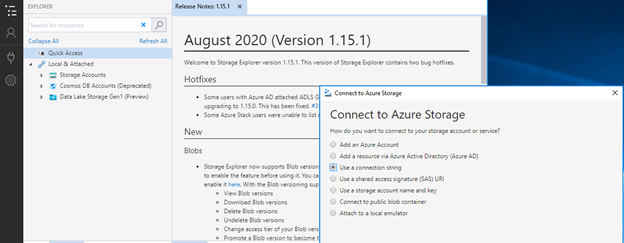
2. Open IE → Download Azure Storage explorer and Install It.
3. After Installation → Launch it
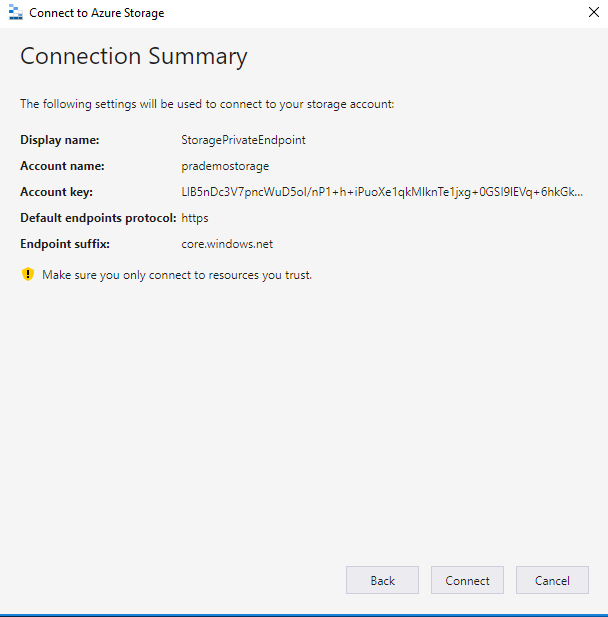
4. Right click on Storage account → Click on Connect using Connection string.
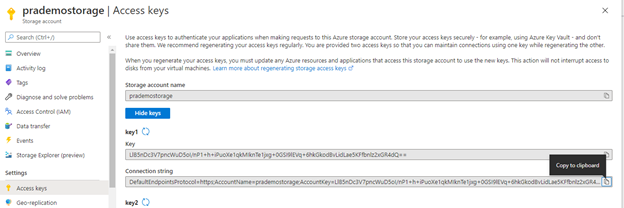
5. Provide some name and add connection string
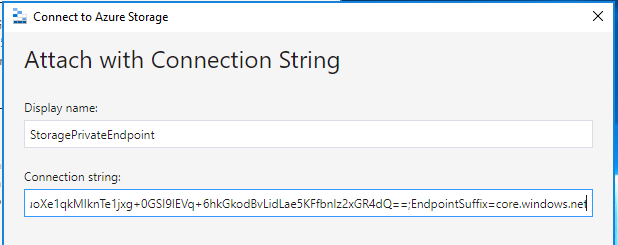
6. Connection string details you can find it from → Go to your Azure Portal → open Azure Storage → click on Access Keys
→ Copy Connection string 1 and paste it.
7. Once it Connects → expand Blob Containers → and try to create a new sub blob. Here you can see you will be able to connect.
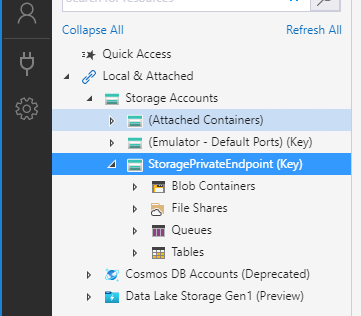
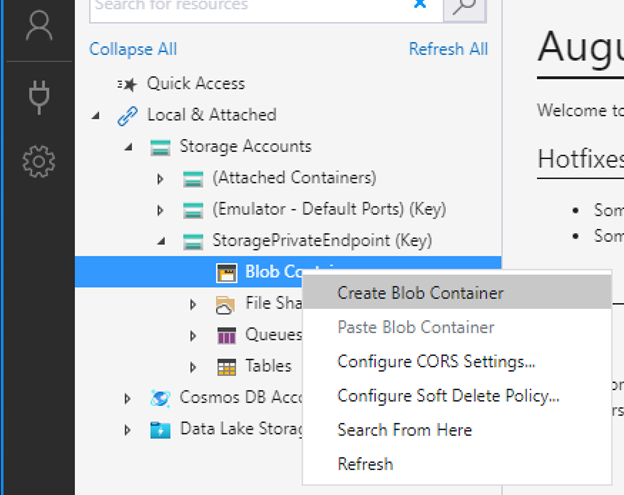

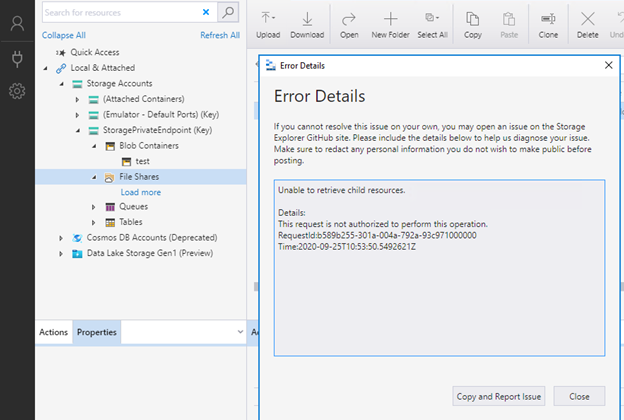
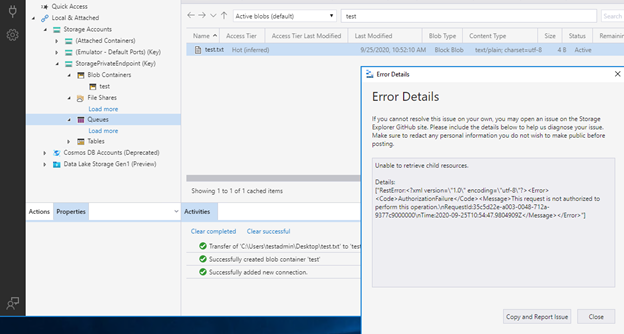
8. Apart from that to make sure you are connected using Private endpoint is try to expand other containers such as Queue's, Table or File Shares.
9. Next validation to make sure you are connectivity privately is → Open PowerShell → type
nslookup <storage name>

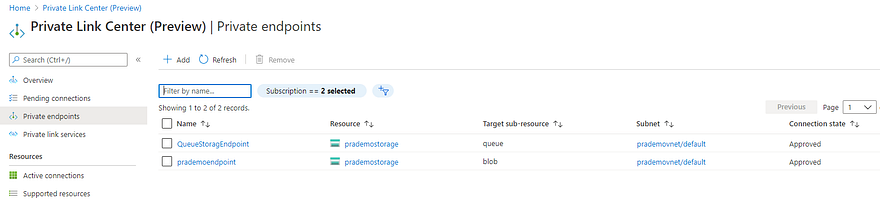
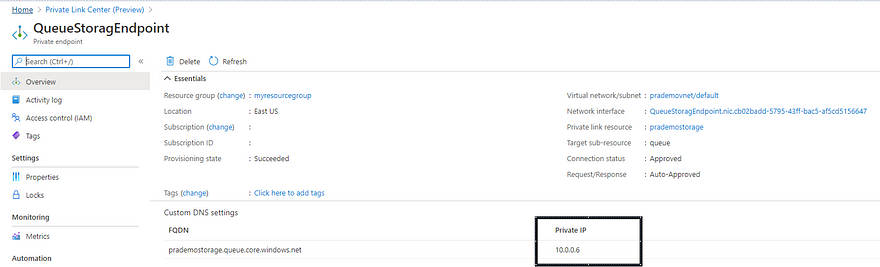
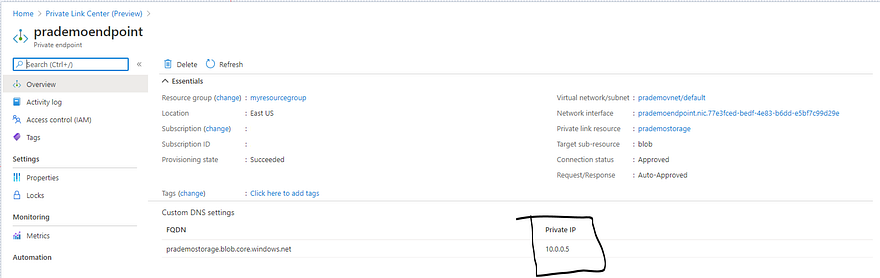
10. Also you can validate using private endpoint validation as well. So i will go back to my Azure Portal → Search Private link
→ click on Private Endpoints → it shows IP address of 10.0.0.5
11. Now if you want to give access to Queue's or Table or FileShare → Go to storage account → Click on Private endpoint
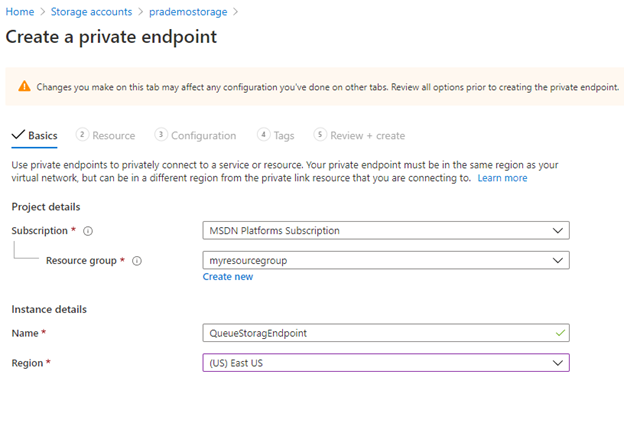
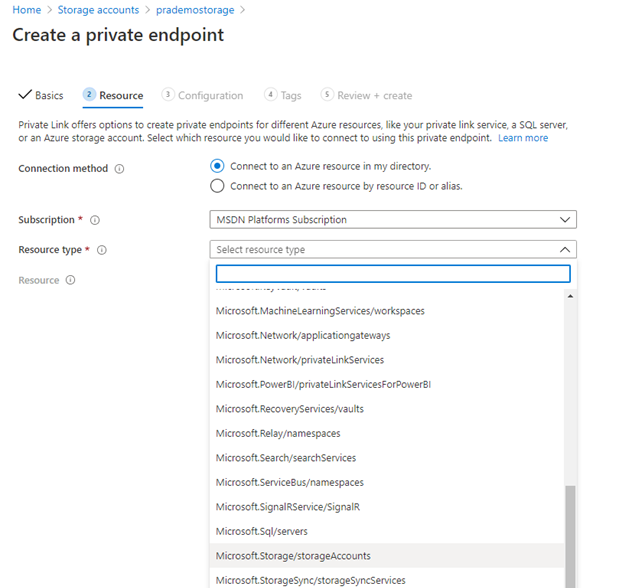
Provide resource and Target sub-resource name.
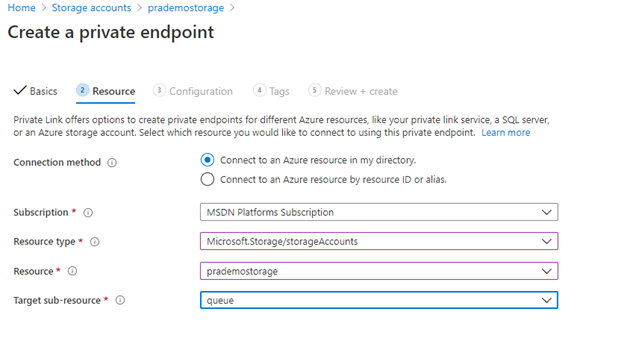
Select Available Vnet
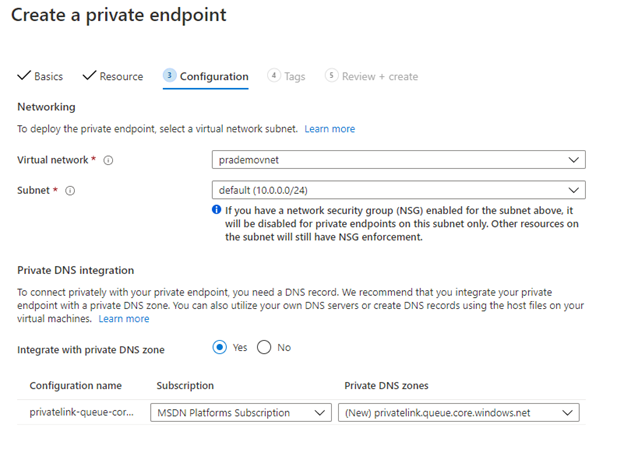
After new Private endpoint creation, let test it.
Once again in order to test Queue private endpoint à I will copy connection string from Storage account and map it with Azure storage explorer.
12. Lets try to expand Queue's and try to create a new testqueue underneath.
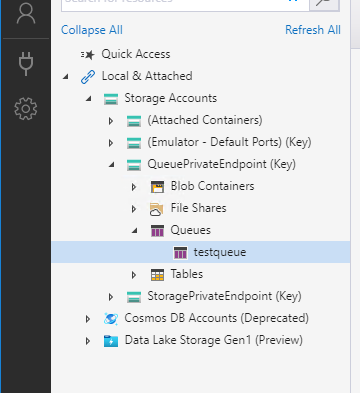
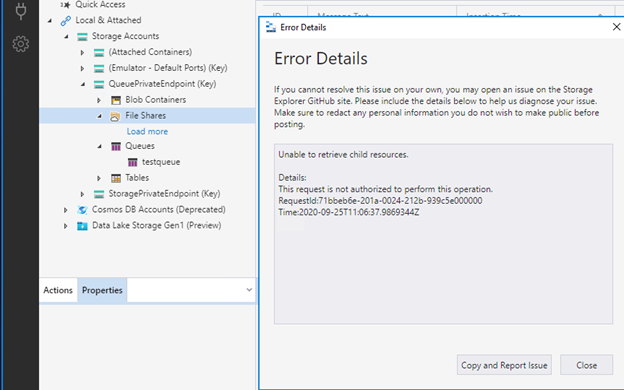
Also try to expand Tables and Fileshares to make sure they are not accessible.
Also for validation we can see associated private IP address for Queue.

Confirm the same from Privateendpoint service as well.