


Create .Net Core Application and Push to GitHub
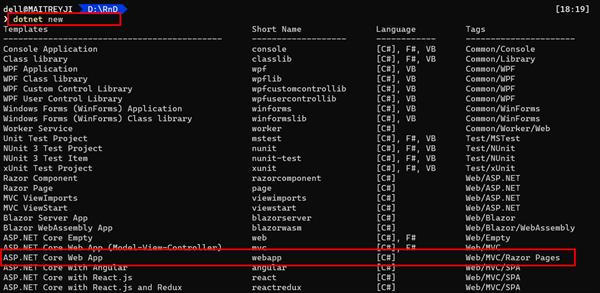
If you know the type of application to be created but not sure about the template name, then you can run the below command. This command will list out the all available templates and you can choose anyone of your choice.
I’m supposed to opt webapp template as highlighted in below image.
The best part of Azure CLI is that if you are not sure about the command syntax, any time you can use --help switch to get the further details of any command. See it in action here…
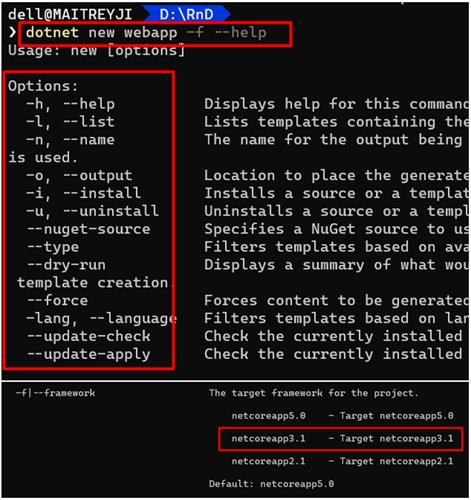
I’m going to create a new dotnet Core application based on 3.1 framework using following CLI dotnet core command
dotnet new webapp -f netcoreapp3.1 -o coreappdemo

Git Steps
- Initialize the git locally
git init
- Add the project to git
git add .
- Commit the project to git for version control
git commit -m “your commit message”
All the 3 commands are preliminary commands to enable git locally before push the code to remote server.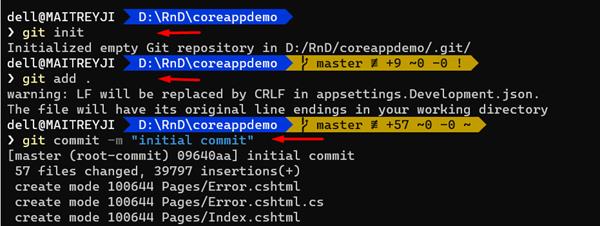
If you don’t have github account, visit and create your account on https://github.com/ and create a new repository. I have my account there but going to create a new repository for completing this demo.
Creation of new repository is straight forward. You can follow the steps given in below snapshots.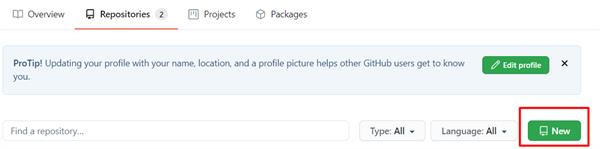
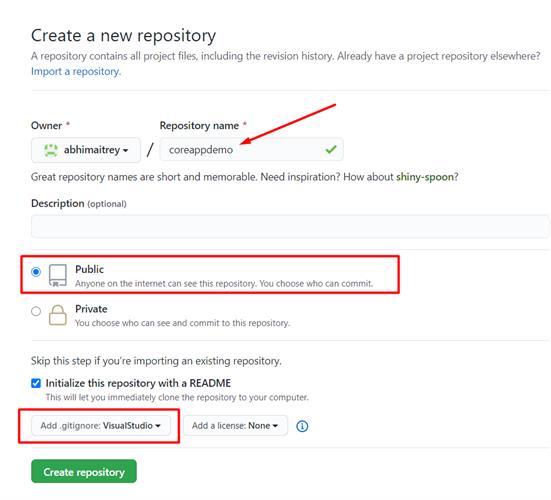
Go to your profile icon and choose Repositories. Click on the New button as mentioned in the above image. This will open another blade which asks for more details about the repository. You have to give a unique repository name. The Public repository will be accessible to any github users but Private repository is meant for a closed group.
It is recommended to add .gitignore file. This will restrict the unnecessary file to get uploaded to the repository. There are variety of .gitignore files available in the given list and you can choose as per the code base.
Once the repository is ready, you can clone this to your local system. Copy the path of the repository from the tiny popup box. Example: https://github.com/abhimaitrey/coreappdemo.git
There are other options than CLI also i.e. GitHub Desktop or download the code as .zip file.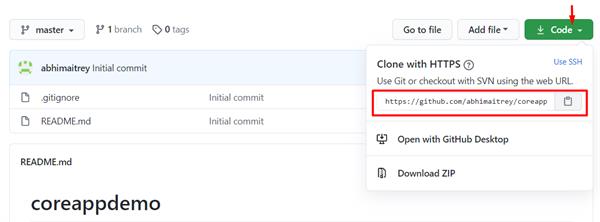
Git Steps for publishing the local repository to remote server
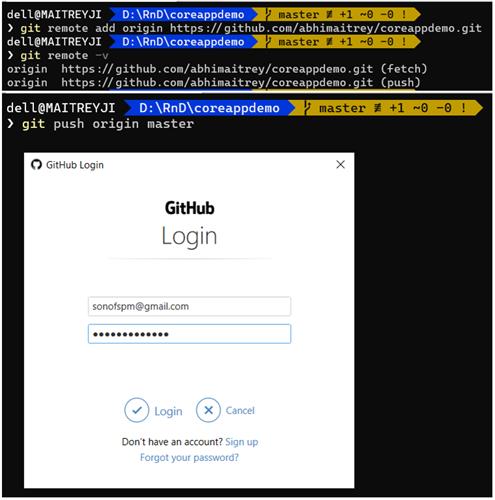
- Establish connection with remote server
git remote add origin https://github.com/abhimaitrey/coreappdemo.git
This step will ask you to give github credentials as given in the snapshot.
- Verify the connection [it is an optional step]
git remote -v
- Pull the remote repo to local first
git pull origin master –allow-unrelated-histories
The unrelated histories flag has been taken because we have code locally which is to be pushed to remote server and in the remote copy there is an additional file Readme.md which is not available in local code so the GitHub will raise the conflict or mismatch of repository issue.
- Push the local code to remote server
git push origin master
I was facing some fatal: The current branch master has no upstream branch. error while push code to remote server. I could resolve the issue with the following command sets.
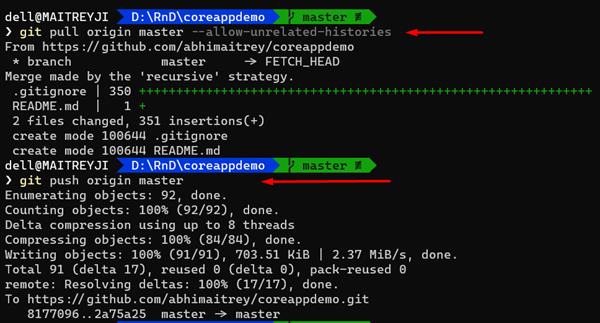
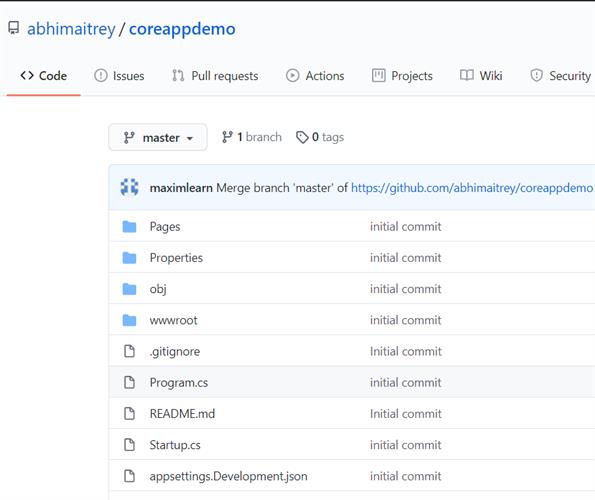
As per the above snapshot, the code has successfully been pushed to remote server. You can now go to github and check the repository. It should have all the files there.