


Git and Github Version Control (Local and Remote Repository)
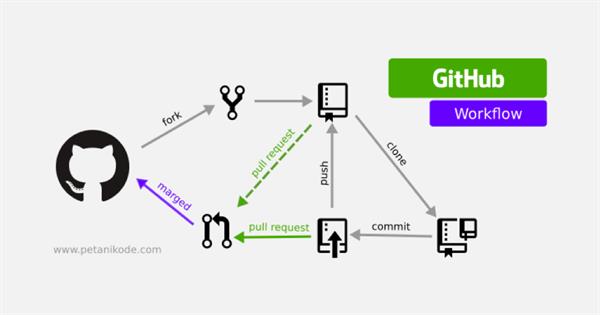
Image Source: Petanikode
- Version Control
- Git Introduction
- Git installation
- Commonly used commands in Git
- Working with Remote Repository
Issues without Version Control:
Once saved, all the changes made in files are permanent and cannot revert back.
No record what was done and by whom.
Version Control:
Version control refers to a system that records changes to a file or set of files over time called the ‘versions’. In other words, these versions will help you in tracking the changes in your codes/project and if necessary, undo those changes as well.
There are three types of version control:
- Local Version Controls
- Centralized Version Controls
- Distributed Version Controls
Local Version Controls
Version database or file in present in the local computer. Multiple people cannot work parallel on the same project.

Centralized Version Controls
In CVC, a central repository is maintained where all versions are kept and now a user checkout, and check-in files from their different computers at any time.
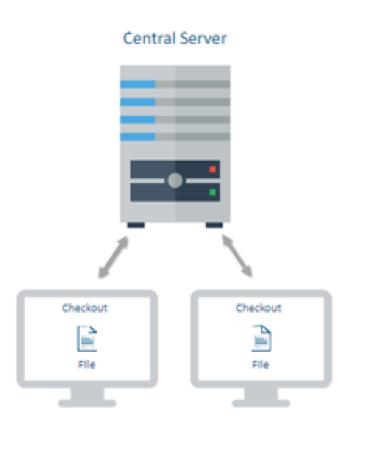
The issue in this CVC, in case of central server failure then the whole system goes down. The solution is below.
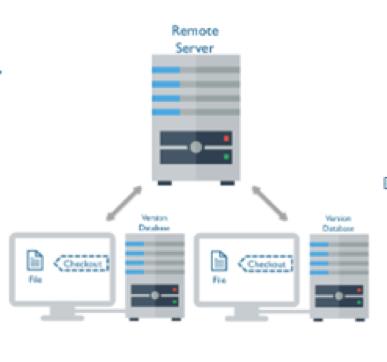
Distributed Version Controls
Version database or file is stored at every user’s local system and at remote servers. If any of the servers dies, a client-server user can be used to restore.
GIT and Github:
Git has distributed version control software which you need to install on your local system in order to use it. For an individual working on a project alone, Git proves to be excellent software.
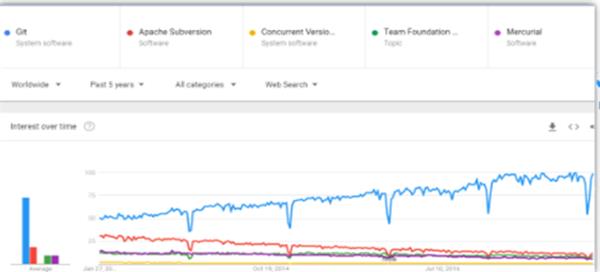
Why Git getting popular and is a clear winner :
The below listed are the advantages of using Git as VC in the market
- Snapshots
- Distributed
- Integrity
- Fast Operations
- BranchHandling
- Robust
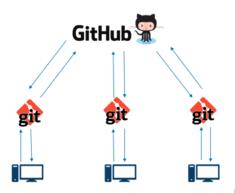
GitHub is a Web-based Git version control repository hosting service. It provides all of the distributed version control and source code management (SCM) functionalities of Git.
|
GIT |
GITHUB |

|

|
|
It is a software |
It is a service |
|
It is installed locally on the system |
It is hosted on Web |
|
It is a tool to manage different versions of edits, made to files in a git repository |
It is a space to upload a copy of the Git repository |
|
It is a command-line tool |
It provides a graphical interface |
Git File Workflow
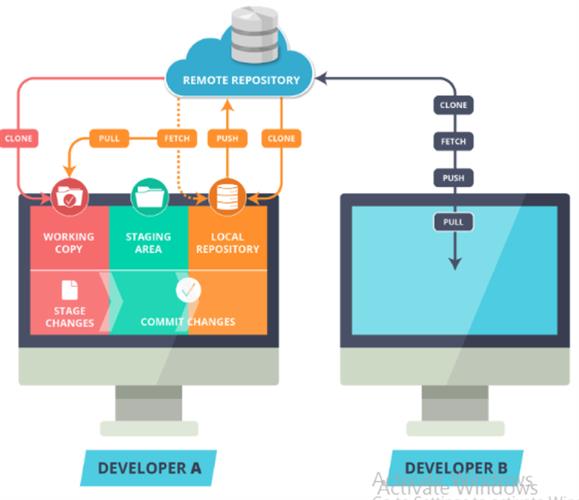
Workspace Copy:
Users active directory simply creates new files in this space and this will track by git.
Stage Area:
It is the place, where all the modified files are marked to be committed, are placed.
Local Repository:
User’s copy of the version database or file and access all the files through local Repos and push the change made to remote
Remote Repository:
It is a server where all the collaborators upload changes made to files.
Clone Command:
Creates a copy of an existing remote repository inside the local repository.
|
Commit Command |
Commits all files from the staging area to local Repository |
|
Push Command |
Push all the changes made in local to Remote Repository |
|
Fetch Command |
Collects the changes from Remote Repository and copies them to Local Repository but does not affect our workspace |
|
Pull Command |
Collects the changes from Remote Repository and copies them to Local Repository along with merges to the current directory or our workspace |

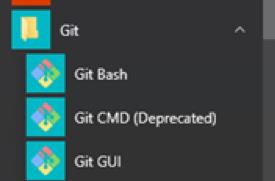
Install Git on Windows :
- Download the latest Git for Windows installer.
- When you've successfully started the installer, you should see the Git Setup wizard screen. Follow the Next and Finish prompts to complete the installation. The default options are pretty sensible for most users.
- Open a Command Prompt (or Git Bash if during installation you elected not to use Git from the Windows Command Prompt).
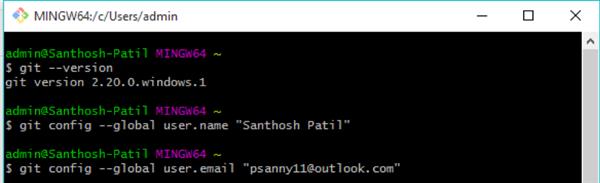
- Run the following commands to configure your Git username and email using the following commands, These details will be associated with any commits that you create:
Following are the Git commands which are being covered:
- git config
- git init
- git clone
- git add
- git commit
- git diff
- git reset
- git status
- git rm
- git log
- git show
- git tag
- git branch
- git checkout
- git merge
- git remote
- git push
- git pull
- git stash
Start a Local repository
- Create a directory to contain the project.
- Go into the new directory.
- Type git init.
- Write some code.
- Type "git add" to add the files.
- Type git commit.
git config
Usage: git config –global user.name “[name]”

Usage: git config –global user.email “[email address]”
This command sets the author's name and email address respectively to be used with your commits.
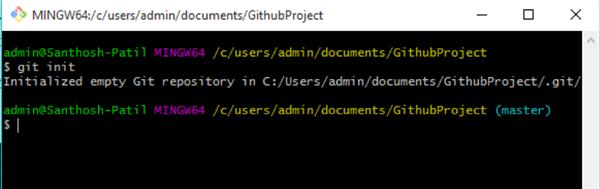
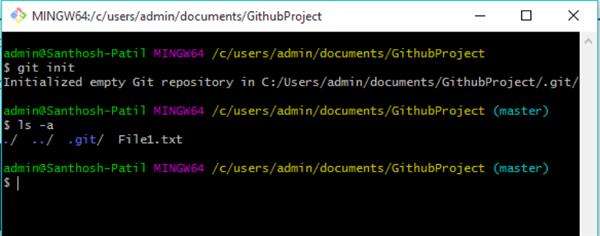
git init
Usage: git init [repository name]This command is used to start a new repository.
Create a Sample Text file in said path
Name: File.txt
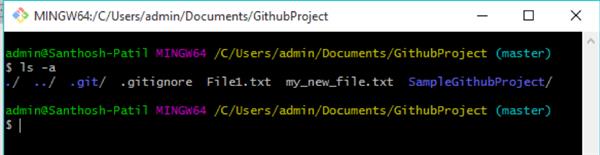
The syntax for list of files in said path, run the below command
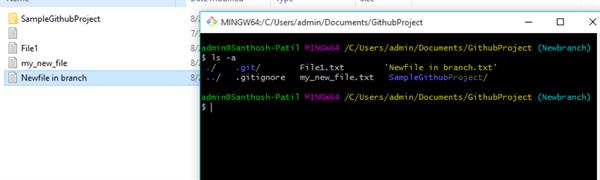
ls –a
Usage: ls –aThis command "is list" all the files from the branch
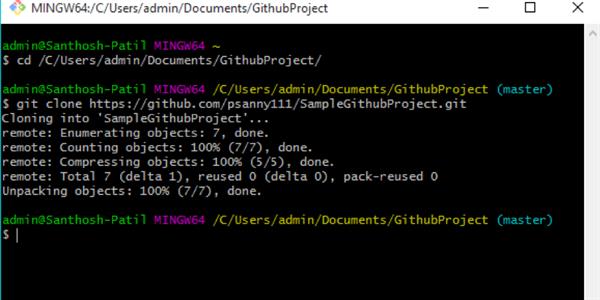
git clone
Usage: git clone [url]This command is used to obtain a repository from an existing URL.

Adding Files and Checking Status :
To add a file to the staging area :
git add <filename>

git add File1.txt
Usage: git add *
This command adds one or more to the staging area.
To check the working tree status :
git status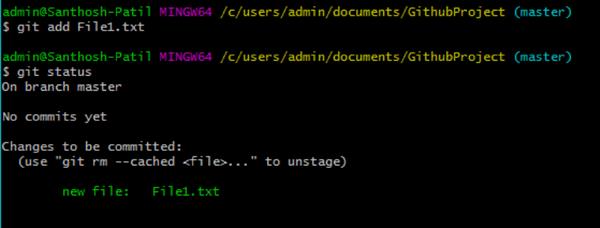
Committing Changes :
To commit the staged files to your local repository
git commit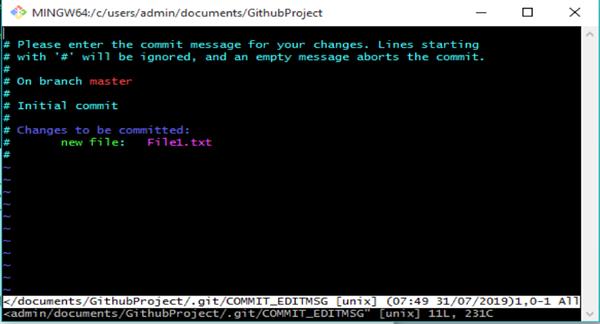
Staging and Committing Multiple Files :
To stage and commit multiple files at once, use –a flag with the commit command
git command –a – m “message”
git diff
Usage: git diff
This command shows the file differences which are not yet staged.
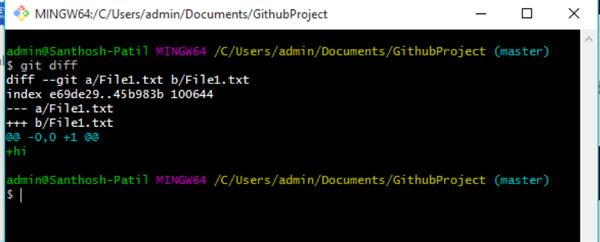
Usage: git diff –staged
This command shows the differences between the files in the staging area and the latest version present.
git reset
Usage: git reset [file]
This command unstages the file, but it preserves the file contents.
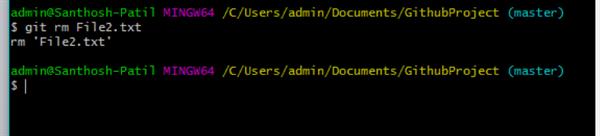
git rm
Usage: git rm [file]
This command deletes the file from your working directory and stages the deletion.
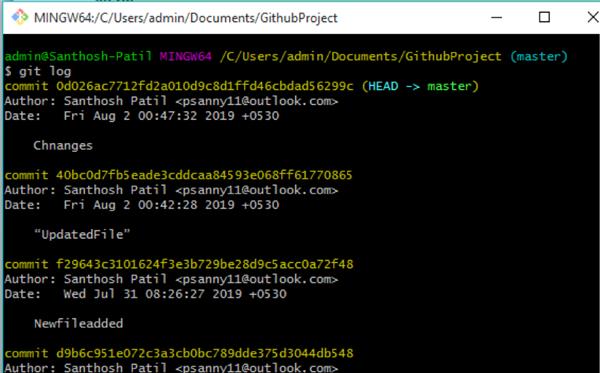
git log
Usage: git log
This command is used to list the version history for the current branch.
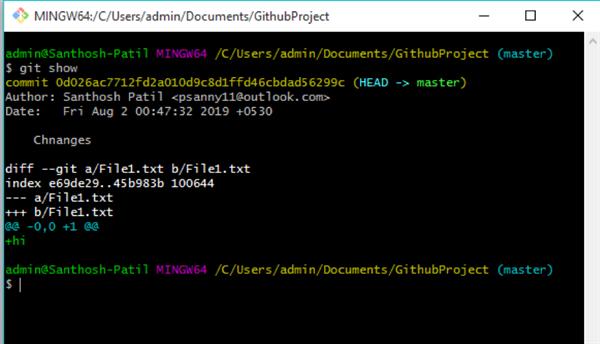
git show
Usage: git show [commit]
This command shows the metadata and content changes of the specified commit.
git tag
Usage: git tag [commitID]
This command is used to give tags to the specified commit.
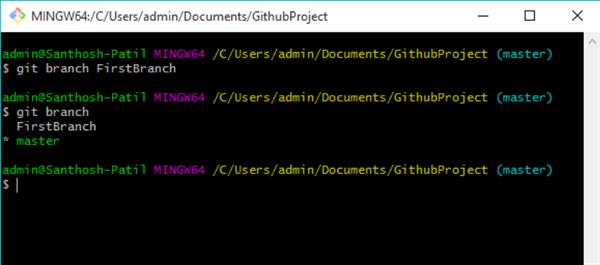
Usage: git branch [branch name]
This command creates a new branch.
Usage: git branch
This command lists all the local branches in the current repository.
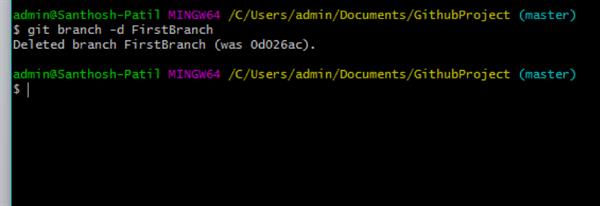
Usage: git branch -d [branch name]
This command deletes the feature branch.
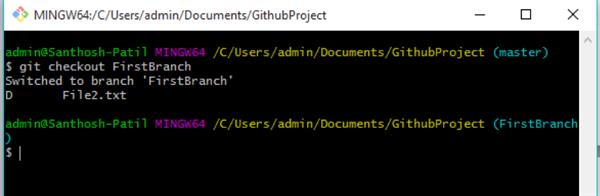
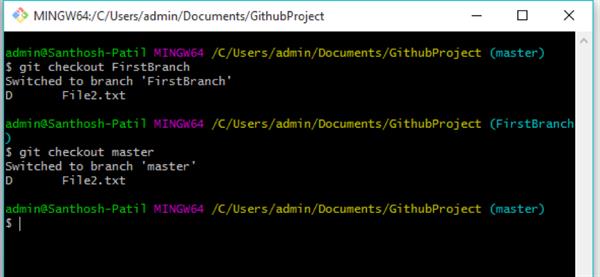
git checkout
Usage: git checkout [branch name]
This command is used to switch from one branch to another.
Back to master
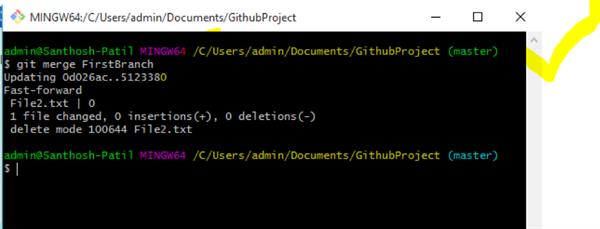
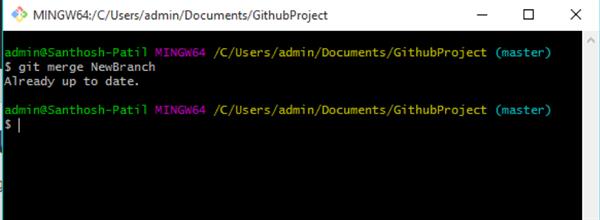
git merge
Usage: git merge [branch name]
This command merges the specified branch’s history into the current branch.
git remote
Usage: git remote add [variable name] [Remote Server Link]
This command is used to connect your local repository to the remote server.

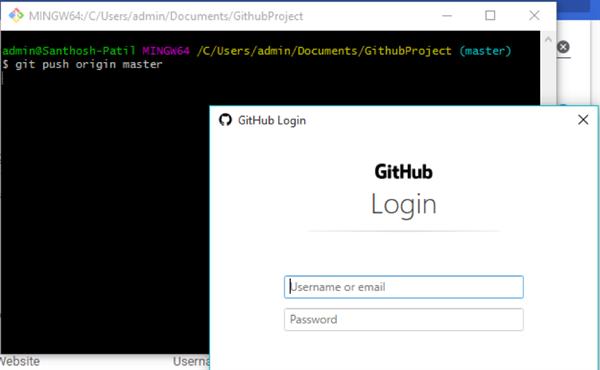
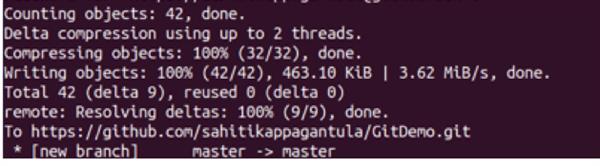
git push
Usage: git push [variable name] master
This command sends the committed changes of the master branch to your remote repository
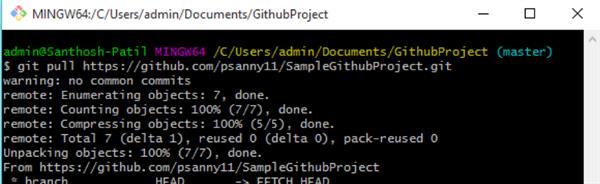
git pull
Usage: git pull [Repository Link]
This command fetches and merges changes on the remote server to your working directory.
git stash
Usage: git stash save
This command temporarily stores all the modified tracked files.
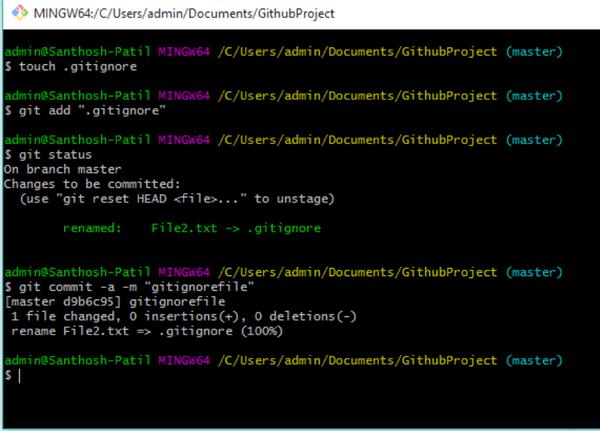
Git ignored
This command which told Git has been explicitly told to ignore.
.gitignore files contain patterns that are matched against file names in your repository to determine whether or not they should be ignored.
Creating a New Branch:
- git branch - An individual line of commit history that contains files that may differ from other branches.
- git checkout - A way to move across the git commits and branches.
- git merge - Combine a branch into the current checked out branch (i.e. the branch you are on).
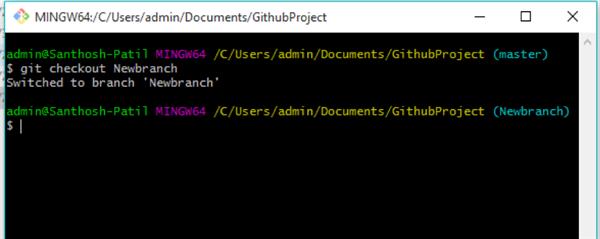
Switching Branches:
Git checkout <branchname>

Merge Branch :
git merge <branchname>
GitHub:
GitHub repository acts as your remote repository. It is a storage space where your project lives. We can keep code files, text files, images or any kind of a file in a repository.
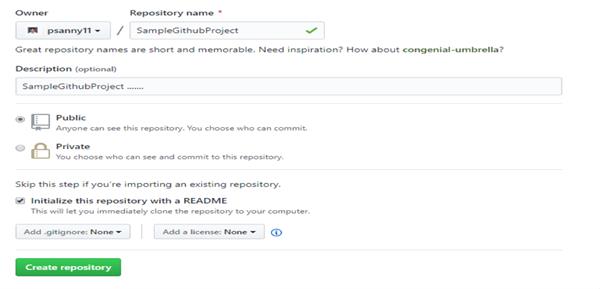
GitHub repository is public which means that anyone can view the contents of this repository whereas, in a private repository, you can choose who can view the content.
Also, the private repository is a paid version. Also, if you refer to the above screenshot, initialize the repository with a README file. This file contains the description of the file and once you check this box, this will be the first file inside your repository.
Creating a GitHub Repository:
- Go to the link: https://github.com/. Fill the sign-up form and click on “Sign up for Github”.
- Click on “Start a new project”.
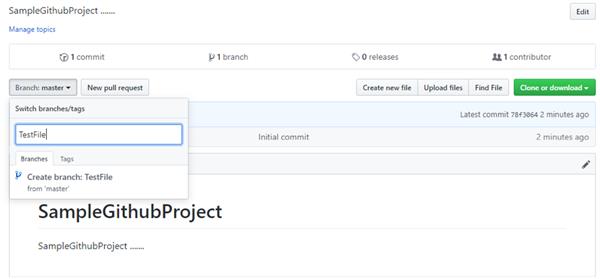
To create a branch in GitHub, follow the below steps:
- Click on the dropdown “Branch: master”
- As soon as you click on the branch, you can find an existing branch or you can create a new one. In my case, I am creating a new branch with the name “Test File”. Refer to the below screenshot for better understanding.
How to use GitHub: Operations
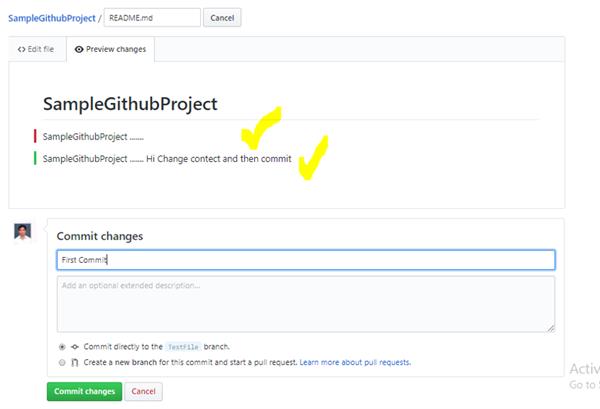
Commit Command:
- Click on the “edit” or a pencil icon in the rightmost corner of the file.
- Once you click on that, an editor will open where you can type in the changes or anything.
- Write a commit message which identifies your changes.
- Click Commit changes in the end.
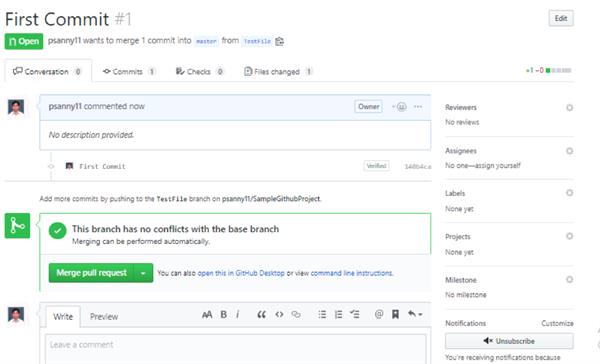
Pull Command:
To merges, this commit changes from sub-branch to master branch
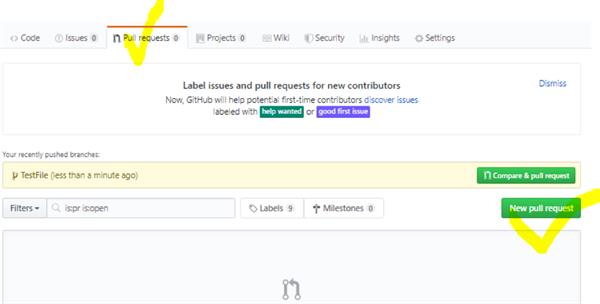
- Click the ‘Pull requests’ tab.
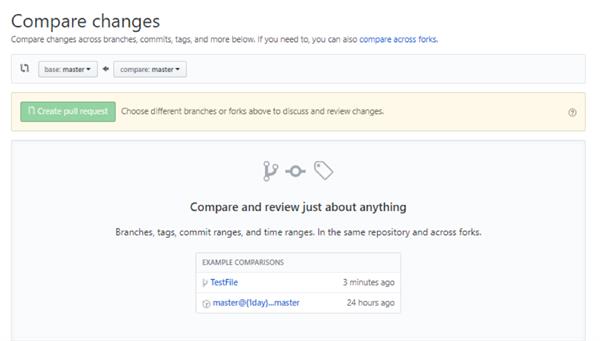
- Click ‘New pull request’.
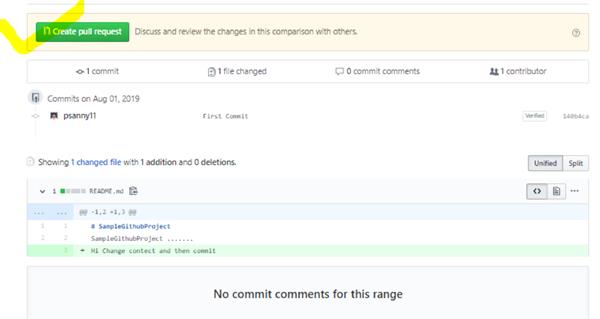
- Once you click on a pull request, select the branch and click ‘readme- changes’ file to view changes between the two files present in our repository.
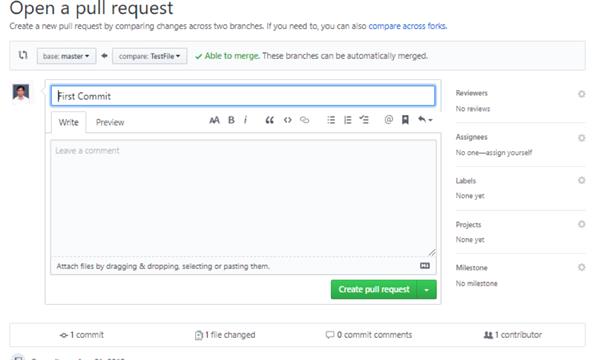
- Click “Create pull request”.
- Enter any title, description to your changes and click on “Create pull request”. Refer to the below screenshots.
Click on create a pull request button.
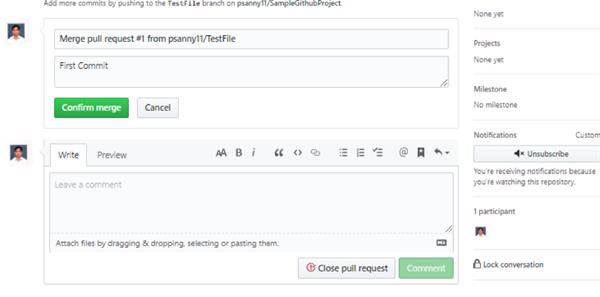
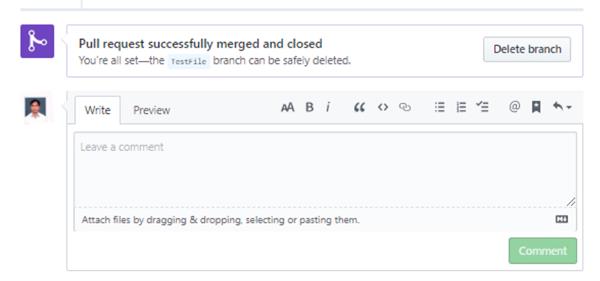
Merge Command:
Here comes the last command which merges the changes into the main master branch. We saw the changes in pink and green color.
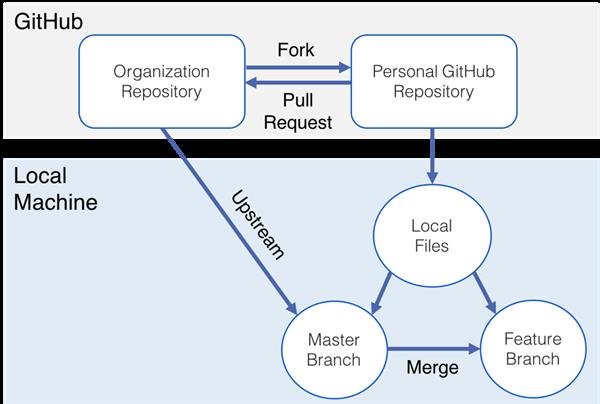
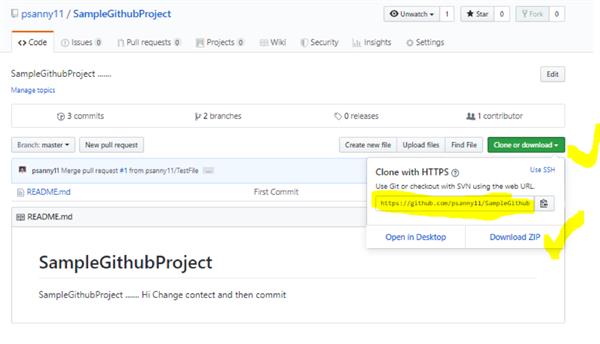
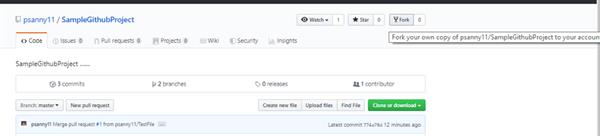
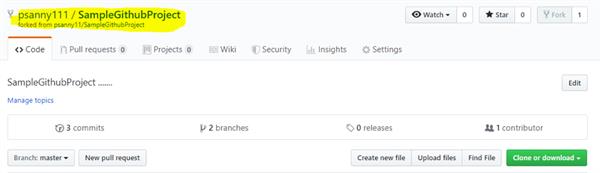
Cloning and Forking GitHub Repository:
We can directly copy the contents by cloning or downloading. Refer to the below screenshot for a better understanding.
Forking:
A fork is a copy of a repository. Forking a repository allows us to freely experiment with changes without affecting the original project.
- We need some code which is present in a public repository, under your repository and GitHub account.
- Changes done to the original repository will be reflected back to the forked repository.
- If you make a change in the forked repository, it will not be reflected in the original repository until and unless you have made a pull request.
Fork can be done by others
- If the project owner likes your work, they might pull your fix into the original repository!
- Propose changes to someone else's project.
That’s all for this post, I hope you enjoyed it and got the solution for “how to use Git and GitHub”.
