


How to create Logic App in Visual Studio
This is the last article on Azure Logic Apps. In my previous article Logic App Hands-On, we have learned how to automate workload of a business using Azure Portal but in this article, we will learn how we can create Logic Apps from Visual Studio 2019. Visual Studio lets you add your logic apps to source control, publish different versions, and create Azure Resource Manager templates for different deployment environments.
Prerequisites
- An Azure subscription. If you don't have, you can subscribe free 30 days. Free Azure account.
- Visual Studio 2019, 2017, or 2015. If you don’t have, click here to download and while installing it the make sure that you select the Azure development I used Visual Studio Community 2019 for this demo.
- Microsoft Azure SDK for .NET 2.9.1 or later. Click here to download it.
- Azure Logic Apps Tools for the Visual Studio version you want that will enable “Open with Logic App Designer” option:
Let’s start to create an azure logic app using visual studio 2019.
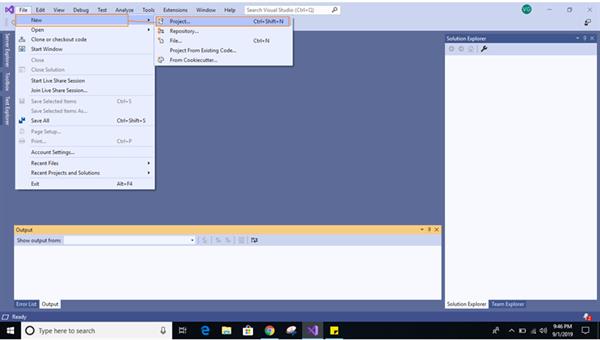
Step1. Open Visual Studio 2019 and follow File=>New=>Project.
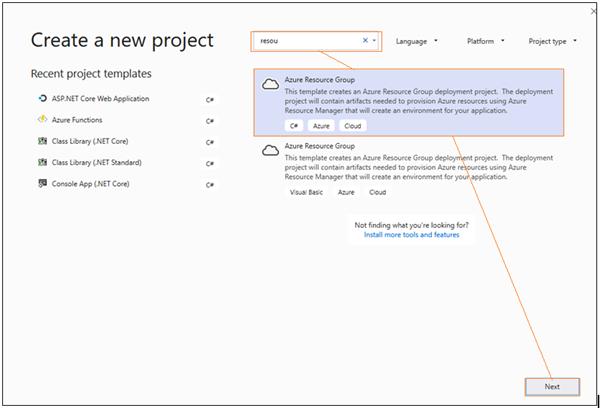
Step2. Search for Azure Resource Group, you will get two projects both are same but language are different one is in c# and the other one is in Visual Basic. So select with c# and click on the Next button.
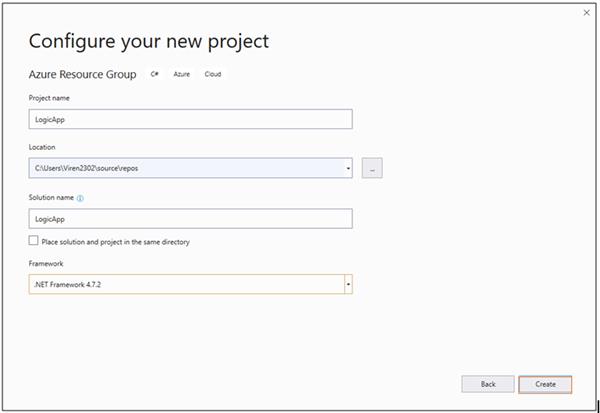
Step3. Fill the few fields like project name and click on Create button.
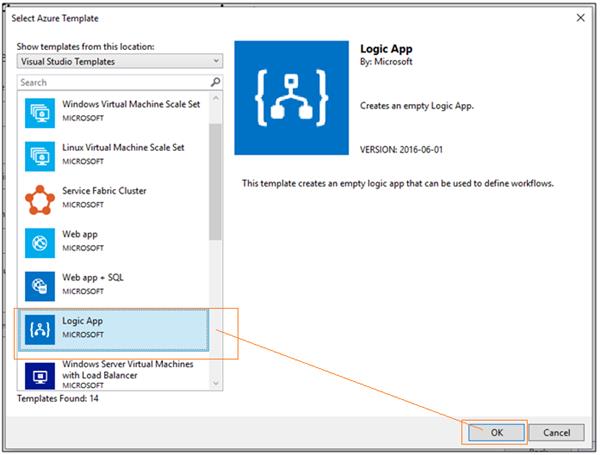
Step4. You will get templates. So select the Logic App and click on the Ok button.
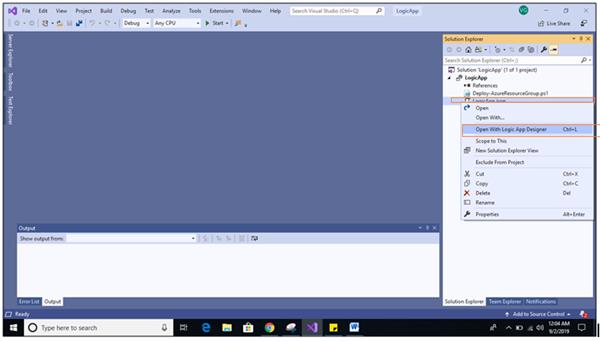
Step5. Now the project is created with few files, right-click on LogicApp.json and select the “Open With Logic App Designer”.
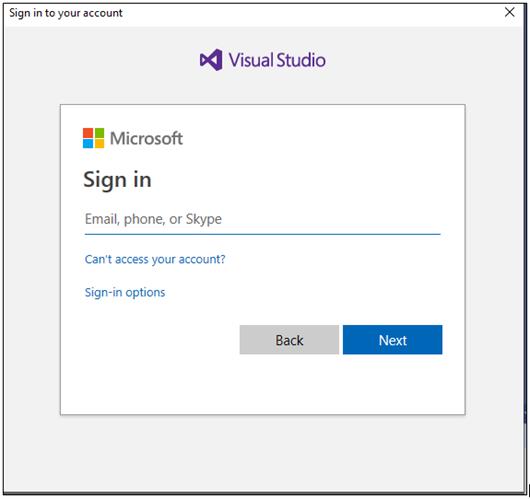
Step6. Next, it will ask for login your Microsoft Azure subscription credentials.
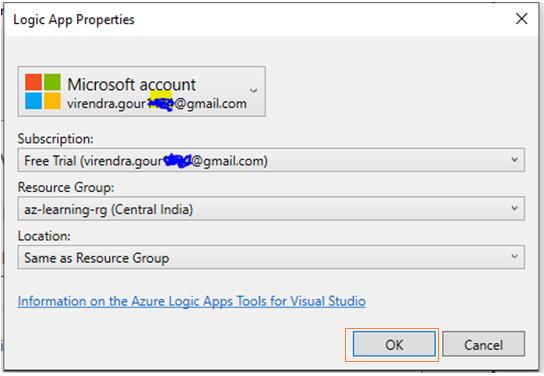
Step7. Next, it will ask for Select Subscription, Resource Group(Create a new one if you do not have already exist) and location(Keep same as Resource Group). Click on the Ok button.
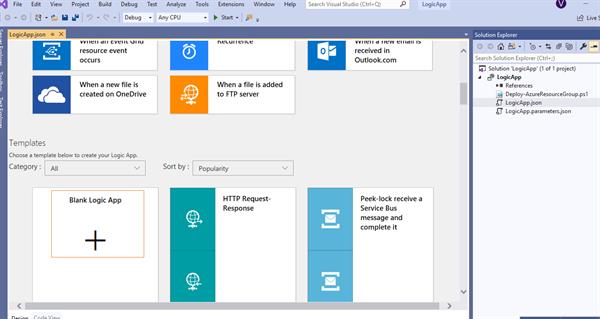
Step8. You will get below screen in your visual studio, and then you can follow my previous article Logic App Hands-On from step11 to end.
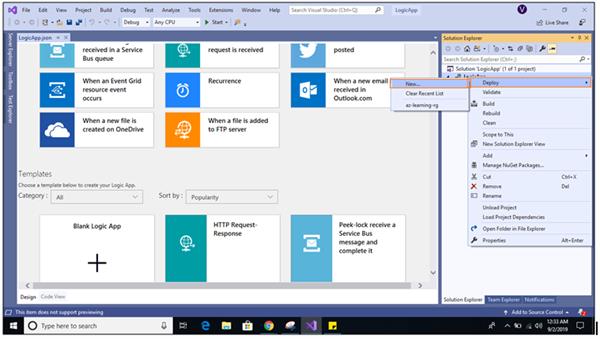
Step9. After completing all the workflow, you can publish this application LogicApp=>Deploy=>New. You will get the same screen as we created Logic App in my article Logic App Hands-On. So fill all the details and create it then whatever workflow we created in the visual studio will publish on that Logic App.
Hope this article will help you.
Thank You.
